
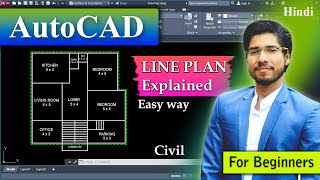
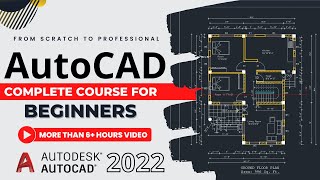
LINE COMMAND
Enroll to start learning
You’ve not yet enrolled in this course. Please enroll for free to listen to audio lessons, classroom podcasts and take practice test.
Interactive Audio Lesson
Listen to a student-teacher conversation explaining the topic in a relatable way.
Activating the Line Command
🔒 Unlock Audio Lesson
Sign up and enroll to listen to this audio lesson

Today, we will learn about the Line Command in CAD. Can anyone tell me how we might activate this command?

Is it by typing 'LINE' or 'L'?
Correct! Once you type 'LINE' or 'L' and press Enter, you activate the command. This command is essential because it allows us to draw straight line segments. Every time you create a line, it becomes a separate object in your design, which is useful for modifications later on.

But why do we need to understand that each line is a separate object?
Great question! Understanding that each is a separate object allows you to edit each line individually without affecting others. This feature enhances the precision of your designs.
To remember this, think of it as building blocks where each block can be moved independently.

So, can we move them around once they are created?
Absolutely! You can move, scale, and modify each segment as needed. Today, we will practice this.
Creating Line Segments
🔒 Unlock Audio Lesson
Sign up and enroll to listen to this audio lesson

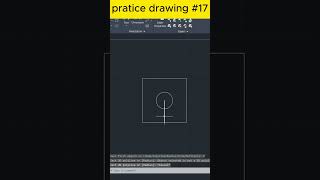
Now that we know how to activate the Line Command, let’s talk about how to create line segments. When we create a line, we need to specify the starting point. For instance, we can start at coordinates `10, 10`. Can anyone tell me what comes next?

We need to move the cursor to a new point and enter coordinates.
Exactly! If we move horizontally to the right, we can type '20' to extend the line. This is where ortho mode helps us keep the lines straight.
Why is ortho mode important?
Ortho mode restricts the cursor movement to vertical and horizontal directions, ensuring that your lines are perfectly aligned. It’s key to maintaining the accuracy of your drawings. Let’s practice creating a series of lines together!
Segment Closure and Interaction
🔒 Unlock Audio Lesson
Sign up and enroll to listen to this audio lesson
After creating our segments, how do we close the shape? Who remembers the command?
Do we type 'c'?
Correct! Typing 'c' closes the line. This is useful when we want to create geometric shapes quickly. It saves us time.
Can you show us an example of a shape we can make?
Certainly! By combining lines and closing them, we can create polygons. Can anyone think of a shape we could draw using the Line Command?
A rectangle or a triangle!
Perfect! Remember, straight lines lead to precise design. Let’s create a few different shapes using what we learned today.
Introduction & Overview
Read summaries of the section's main ideas at different levels of detail.
Quick Overview
Standard
This section introduces the Line Command in CAD, detailing how to create individual line segments using coordinates and the orthogonal mode. It emphasizes that each segment is a separate object, providing a foundation for creating more complex shapes.
Detailed
Line Command in CAD
The Line Command is a fundamental tool in Computer-Aided Design (CAD) used to create straight lines or line segments. Each created line segment is treated as a distinct object, allowing for flexibility in editing and manipulation.
Key Points:
- Command Activation: Users can activate the Line Command by typing
LINEor simplyL, followed by pressingEnter. - Creating Line Segments: Line segments can be drawn by specifying points. For example:
- From point:
10, 10 - To point: Move the cursor to a specified coordinate, engaging orthogonal mode (ortho ON). For instance, typing
20results in a horizontal movement, followed by a vertical movement of20, creating an 'L' shaped path. - Segment Closure: The command allows for easy closure of the line segments by typing
cafter defining the segments.
The ability to create distinct segments lays the groundwork for more complex designs and shapes in CAD drawings.
Youtube Videos


Audio Book
Dive deep into the subject with an immersive audiobook experience.
Introduction to the Line Command
Chapter 1 of 3
🔒 Unlock Audio Chapter
Sign up and enroll to access the full audio experience
Chapter Content
A. LINE COMMAND: It creates one or series of straight line segments here each line segment is a separate object.
Detailed Explanation
The Line Command is used to draw straight lines in a drawing application. Each segment of the line you create is treated as an individual object, which means you can manipulate each line segment separately once it's drawn.
Examples & Analogies
Think of drawing a straight line with a ruler on paper. Each time you lift the pencil and put it down creates a new segment. Just like that, each time you use the Line command to create a line, it's like drawing with a ruler where every separate line can be adjusted independently.
Using the Line Command
Chapter 2 of 3
🔒 Unlock Audio Chapter
Sign up and enroll to access the full audio experience
Chapter Content
COMMAND: LINE or L (PRESS ENTER)
Detailed Explanation
To start using the Line Command, type 'LINE' or simply 'L' and press the Enter key. This initiates the command and allows you to start defining the points of your line.
Examples & Analogies
Imagine you are setting up a game of connect-the-dots. You begin by selecting the first dot (first point) and then connecting it to the second one (next point). Each command to draw a line is like saying, 'connect this dot to that dot' while following the steps of the game.
Defining the Points
Chapter 3 of 3
🔒 Unlock Audio Chapter
Sign up and enroll to access the full audio experience
Chapter Content
From point: 10, 10
To point: (Move the cursor horizontally to right with ortho ON) type 20, press enter.
To point: (Move the cursor horizontal, vertically up) type 20, press enter.
To point: (Move the cursor horizontally to left) type 20, press enter.
To point: c.
Detailed Explanation
You start by specifying the coordinates of where the line begins; for example, (10,10). After that, you can define where the line ends. Using the cursor and the 'Ortho' mode activated allows you to move in straight lines—either to the right, up, or left—and you specify each endpoint by typing the coordinates and pressing Enter.
Examples & Analogies
Imagine plotting a treasure map. You mark your starting point with a pencil (10,10), then measure a straight line to the treasure (20 points right), then straight up (20 points), and then back left to retrace your path. Each direction you take is carefully marked by coordinates, just like planning your route on a map.
Key Concepts
-
Line Definition: Straight segments created in CAD, manipulated as separate objects.
-
Ortho Mode Significance: Helps to align lines perfectly to the horizontal and vertical plane.
-
Segment Closure: The process of closing a shape by using the command 'c'.
Examples & Applications
Creating an 'L' shape using the Line Command by specifying coordinates.
Drawing a rectangle by combining four line segments and closing it using 'c'.
Memory Aids
Interactive tools to help you remember key concepts
Rhymes
To make a line that's oh so straight, 'L' is the key to create!
Stories
Imagine you are an architect. With each new line you draw, you lay the foundations for your grand vision, each line building upon the last to create a masterpiece.
Memory Tools
Remember: L for Line, O for Ortho mode, S for Separate segments.
Acronyms
LOS helps
= Line Command
= Ortho ON
= Separate objects.
Flash Cards
Glossary
- Line Command
A command in CAD software that allows the user to create straight line segments.
- Ortho Mode
A mode that restricts cursor movement to only horizontal and vertical directions for accurate drawing.
- Segment
A part of a line created by the Line Command, considered a separate object.
Reference links
Supplementary resources to enhance your learning experience.