
pH Measurement Procedures
Enroll to start learning
You’ve not yet enrolled in this course. Please enroll for free to listen to audio lessons, classroom podcasts and take practice test.
Interactive Audio Lesson
Listen to a student-teacher conversation explaining the topic in a relatable way.
Introduction to Lime Stabilization
🔒 Unlock Audio Lesson
Sign up and enroll to listen to this audio lesson

Today we’re going to discuss lime stabilization and its importance in civil engineering. Lime not only reduces plasticity but also increases strength in soils. Can anyone explain why that might be important?

It’s important because stabilizing soil helps make it more workable and durable, especially for infrastructure!

And it also reduces swelling, right? Which is critical for road construction!
Exactly! Reduced plasticity means less deformation under load. Now, what do we need to measure to determine the right amount of lime?

We need to measure the pH of the soil-lime mixture!
Yes! The pH is crucial as it tells us how effective the lime will be. Remember the target pH we aim for?

We aim for a pH of 12.4 or higher!
Good! Let’s summarize: Lime stabilization enhances soil properties, with pH measurement guiding optimal lime content.
pH Measurement Procedures
🔒 Unlock Audio Lesson
Sign up and enroll to listen to this audio lesson

Now, let's dive into the pH measurement procedure. Who can describe the first step when preparing for a pH test?
We need to collect air-dried soil samples, right? Around 20 grams should be enough.
Correct! And what happens after we weigh the soil?
We add different percentages of lime—3% to 7%—to see which works best!
Great! And then we mix it with CO2-free distilled water. Can anyone tell me why we use CO2-free water?
Because CO2 can affect the pH readings, so we want accurate results!
Exactly! After mixing, we need to measure the pH. How do we do that?
With a pH meter calibrated to a buffer solution!
That's right! After one hour of mixing, we can accurately assess the pH of the mixture.
What do we do if the pH doesn't reach 12.4?
We would need to run additional tests with higher lime percentages. To conclude, always monitor pH to ensure effective soil stabilization.
Key Soil Tests
🔒 Unlock Audio Lesson
Sign up and enroll to listen to this audio lesson
After we determine the optimal lime percentage, which additional tests do you think we should conduct?
Atterberg limits are important to determine the soil's behavior with lime.
Yes, and what about compaction?
We need to perform compaction tests to check how the density changes over time!
Exactly! Compaction is essential in assessing stability and ensuring that the soil can bear loads effectively. Let’s recap: pH measurements guide lime content, and further testing confirms stabilization.
It sounds like a comprehensive process to ensure soil quality!
Introduction & Overview
Read summaries of the section's main ideas at different levels of detail.
Quick Overview
Standard
The procedures described focus on measuring the pH of lime-soil mixtures to determine the correct amount of lime needed for stabilization. Key factors influencing lime effectiveness include soil particle size, composition, and the resultant properties after treatment.
Detailed
Detailed Overview of pH Measurement Procedures
Lime stabilization involves treating soils, particularly medium to fine-grained types, to enhance their physical properties such as reducing plasticity and increasing strength. A critical aspect of this process is determining the optimal lime content, which is closely tied to the soil's pH level. Procedures such as mechanical and physical tests are fundamental in establishing the requisite lime amount, with emphasis on achieving a pH of at least 12.4.
The protocol for pH measurement is as follows:
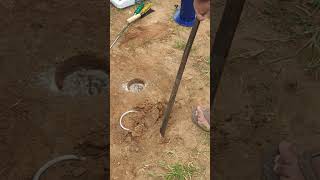
1. Sample Preparation: Collect 20 g of air-dried soil and put it in a plastic container. Five different lime percentages (3%, 4%, 5%, 6%, and 7%) are tested.
2. Lime Addition and Mixing: Weigh and add lime to the soil, followed by CO2-free distilled water, and mix thoroughly.
3. pH Measurement: After mixing, the pH is measured using a calibrated pH meter. A pH reading of 12.40 or more indicates sufficient stabilization, and if lower, further tests with additional lime percentages may be necessary.
4. Further Testing: After optimization, Atterberg limits and compaction tests are conducted to ensure proper stabilization.
This systematic approach to testing and measuring allows for effective soil treatment, enhancing stability and performance in construction.
Youtube Videos


Audio Book
Dive deep into the subject with an immersive audiobook experience.
Introduction to pH Measurement
Chapter 1 of 7
🔒 Unlock Audio Chapter
Sign up and enroll to access the full audio experience
Chapter Content
The following procedures shall be utilized to determine the amount of lime required to stabilize the subgrade. Hydrated or quick lime and lime by-products should be used in the range of 4 ± 0.5% and 5 ± 1% by weight of soil for modification respectively.
Detailed Explanation
In order to stabilize soil using lime, we need to measure how much lime to add. The recommended amounts of lime vary based on the type used. Hydrated lime should be used at approximately 4% of the soil's weight, with a permissible variation of 0.5%. Quick lime, on the other hand, should be used at about 5% of the soil's weight, with a 1% tolerance.
Examples & Analogies
Think of it like adding sugar to tea. Just as too little sugar makes the tea taste bland, and too much can make it overly sweet, the right amount of lime will ensure the soil is just right for stabilization.
Testing Soil and Lime pH
Chapter 2 of 7
🔒 Unlock Audio Chapter
Sign up and enroll to access the full audio experience
Chapter Content
Determine the separate pH of soil and lime samples. Determine optimum lime content using Eades and Grim pH test. A sufficient amount of lime shall be added to soils to produce a pH of 12.4 or equal to the pH of lime itself.
Detailed Explanation
To find the best lime mix for the soil, we need to test the pH of both the soil and lime samples. The aim is to adjust the lime content until the soil's pH reaches at least 12.4, which indicates proper stabilization. The Eades and Grim test is a specific method used to perform this pH measurement.
Examples & Analogies
Imagine you are a chef aiming for the perfect acidity in a dish. You taste and adjust the vinegar or lemon juice bit by bit until it hits that balanced flavor. Similarly, we adjust the lime until the soil reaches the desired pH level.
Setting Up pH Measurement
Chapter 3 of 7
🔒 Unlock Audio Chapter
Sign up and enroll to access the full audio experience
Chapter Content
It is advisable to set up five bottles with lime percentages of 3, 4, 5, 6, and 7. This will insure, in most cases, that the percentage of lime required can be determined in one hour.
Detailed Explanation
For the pH test, we prepare five bottles with varying percentages of lime – specifically 3% through 7%. This setup helps us quickly identify the right amount of lime needed, typically within an hour, ensuring that the experiment is efficient and effective.
Examples & Analogies
Think of a science experiment where you test different mixes of colors to get the perfect shade you want. By trying out a range of percentages with the lime, you can see which one produces the desired results.
Conducting the pH Measurement
Chapter 4 of 7
🔒 Unlock Audio Chapter
Sign up and enroll to access the full audio experience
Chapter Content
Shake the soil-lime mixture and water until there is no evidence of dry material on the bottom. Shake for a minimum of 30 seconds. Shake the bottles for 30 seconds every 10 minutes.
Detailed Explanation
After adding water to the soil-lime mixture, we need to shake it thoroughly to ensure everything is well mixed and that there are no dry clumps left. This process should be done for a minimum of 30 seconds initially, then again every 10 minutes to keep everything uniform until we take our pH measurement.
Examples & Analogies
This mixing process is similar to stirring a pot of soup. Just like you would stir to combine all ingredients evenly, you must ensure the lime and soil are thoroughly mixed with water.
Measuring and Interpreting pH Results
Chapter 5 of 7
🔒 Unlock Audio Chapter
Sign up and enroll to access the full audio experience
Chapter Content
After one hour, transfer part of the slurry to a plastic beaker and measure the pH. Record the pH for each of the lime-soil mixtures. If the pH readings go to 12.40, then the lowest percent lime that gives a pH of 12.40 is the percentage required to stabilize the soil.
Detailed Explanation
One hour after mixing, we take a sample of the mixture to measure its pH using a special pH meter. We observe how the pH changes with different lime percentages, and if we reach a pH of 12.4, we note that percentage of lime as it is deemed sufficient for soil stabilization.
Examples & Analogies
This step is like reading the temperature on a thermometer after cooking. Just as you check to see if the food has reached the desired temperature for safety and flavor, we check the pH to ensure it's right for stabilizing the soil.
Finalizing the Optimal Lime Content
Chapter 6 of 7
🔒 Unlock Audio Chapter
Sign up and enroll to access the full audio experience
Chapter Content
If the pH does not go beyond 12.30 and 2 percentages of lime give the same readings, the lowest percent which gives a pH of 12.30 is the amount required to stabilize the soil.
Detailed Explanation
If we find that the pH does not exceed 12.30 after testing different lime amounts, we then take the lower lime percentage that achieved a pH of 12.30 as the required amount for soil stabilization. This ensures we use the least amount of lime that is effective.
Examples & Analogies
It's similar to finding a sweet spot while baking. If a lesser amount of sweetener gives you that perfect taste, you'd prefer to use just that amount instead of going overboard.
Conducting Further Tests
Chapter 7 of 7
🔒 Unlock Audio Chapter
Sign up and enroll to access the full audio experience
Chapter Content
Atterberg limits should be performed on the soil-lime mixtures corresponding to optimum lime content as determined above. Compaction shall be performed...
Detailed Explanation
Once the optimal lime content is established, we must conduct additional tests like the Atterberg limits test to understand the soil's consistency. We also check how compact the soil mixture can get, which helps inform construction decisions.
Examples & Analogies
Imagine testing a cake by checking its texture and how well it holds together – similar probing will help us understand how the soil-lime mixture behaves under different conditions.
Key Concepts
-
Lime Stabilization: Enhances soil stability and reduces plasticity.
-
pH Measurement: Critical for determining optimal lime content.
-
Atterberg Limits: Important for assessing soil behavior post-treatment.
-
Compaction Testing: Evaluates soil density after stabilization.
Examples & Applications
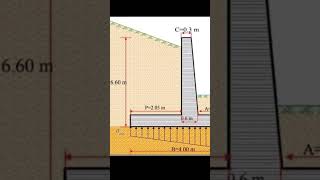
An example of lime stabilization is treating clayey soil at a construction site to improve load-bearing capacity.
Another example includes using hydrated lime to stabilize a subgrade for a new roadway.
Memory Aids
Interactive tools to help you remember key concepts
Rhymes
To stabilize soil, do not stroll, mix with lime to reach the pH goal!
Stories
Imagine a builder mixing earth and lime carefully, hoping to reach the perfect pH that transforms muddy clay into sturdy ground. This journey helps everyone understand how soil becomes safe for roads!
Memory Tools
LIME: Level, Improve, Measure, Ensure (for stabilization process).
Acronyms
SOIL
Stabilization
Optimize
Incorporate
Limit (to remember key processes in soil treatment).
Flash Cards
Glossary
- Lime Stabilization
A process in which lime is used to alter the physical properties of soil, reducing plasticity and enhancing strength.
- pH
A scale used to specify the acidity or basicity of an aqueous solution, crucial for determining the effectiveness of lime soil stabilization.
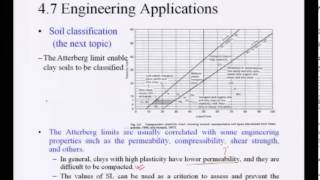
- Atterberg Limits
Tests that determine the moisture content at which soil changes from plastic to liquid, as well as its consistency limits.
- Mechanical Tests
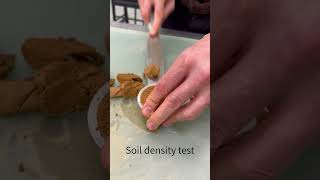
Assessments to determine the various physical properties of the soil, such as density and compaction characteristics.
- Compaction Tests
Tests to evaluate how much soil can be compacted when subjected to mechanical energy.
Reference links
Supplementary resources to enhance your learning experience.