
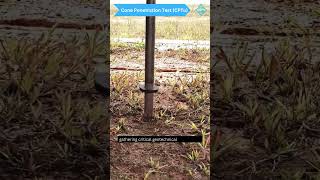
Specific Testing Protocols
Enroll to start learning
You’ve not yet enrolled in this course. Please enroll for free to listen to audio lessons, classroom podcasts and take practice test.
Interactive Audio Lesson
Listen to a student-teacher conversation explaining the topic in a relatable way.
Introduction to Lime Stabilization
🔒 Unlock Audio Lesson
Sign up and enroll to listen to this audio lesson

Today, we'll discuss lime stabilization. Who can tell me why lime is used with soils, particularly fine-grained ones?

It’s used to improve soil strength and decrease plasticity.
Exactly! Lime reacts with soils to alter their properties, like increasing workability.

I heard it can also help reduce swelling?
Yes, that's correct! This is crucial for construction stability. Remember, we can summarize this as 'Lime Leads to Strength.'
Testing Procedures for Lime Stabilization
🔒 Unlock Audio Lesson
Sign up and enroll to listen to this audio lesson

Now, let's dive into the testing protocols. Can anyone explain how we determine the amount of lime needed?

Do we perform mechanical tests first?
Yes, we start by performing mechanical and physical tests on the soils. What do we do next?

Determine the pH levels of both soil and lime!
Correct! The optimum lime content is found using the Eades and Grim pH test. What's our target pH?
Is it 12.4?
Right! We aim for a pH of 12.4 to ensure effective soil stabilization.
Is there a specific way we mix lime with soil?
Yes! We weigh out soil and lime, mix them in bottles, and then add water is critical for an accurate reading.
Introduction & Overview
Read summaries of the section's main ideas at different levels of detail.
Quick Overview
Standard
The section describes the procedures for testing soil properties and the amount of lime needed for stabilization to improve soil characteristics. This includes procedures for mechanical tests, pH testing, and Atterberg limits assessment. The significance of pH in the stabilization process and the tests needed for proper soil-lime mixture evaluation are also discussed.
Detailed
Detailed Summary
This section focuses on specific testing protocols necessary for optimizing lime stabilization in subgrade soils. Lime is used to react with medium, moderately fine, and fine-grained soils to enhance properties like strength, workability, and to decrease plasticity and swelling. Key soil characteristics affecting the reaction include:
- pH: The ability of soil to react with lime.
- Organic Content: Influences the effectiveness of lime stabilization.
- Natural Drainage: Affects moisture levels in the soil.
- Clay Mineralogy: Influences how well the soil can bond with lime.
To determine the amount of lime for soil stabilization, follow these protocols:
1. Use hydrated or quick lime within specified percentages (4 ± 0.5% or 5 ± 1% by weight of soil).
2. Perform mechanical and physical tests on the soil.
3. Measure the pH of both soil and lime.
4. Utilize the Eades and Grim pH test to identify optimum lime content, aiming for a mixture pH of 12.4 or the lime's pH. A graph can be plotted to visualize this.
The testing process includes:
- Weighing soil samples (20 g of oven-dried soil) into plastic bottles for mixing with lime percentages (3, 4, 5, 6, and 7).
- Shaking the mixture to ensure homogeneity.
- After 1 hour, measuring the pH and determining the necessary lime percentage based on pH results. If pH remains low, additional tests with higher lime percentages may be required.
- Additional tests like Atterberg limits and compaction (AASHTO T 99) should be performed to evaluate the mixture's performance.
- It's essential to conduct the Unconfined Compression Test and California Bearing Ratio (AASHTO T 193) at specified compaction levels for a comprehensive analysis.
Youtube Videos


Audio Book
Dive deep into the subject with an immersive audiobook experience.
Determining Lime Content
Chapter 1 of 7
🔒 Unlock Audio Chapter
Sign up and enroll to access the full audio experience
Chapter Content
The following procedures shall be utilized to determine the amount of lime required to stabilize the subgrade. Hydrated or quick lime and lime by-products should be used in the range of 4 ± 0.5% and 5 ± 1% by weight of soil for modification respectively.
Detailed Explanation
To stabilize soil, specific amounts of lime are required. The standard recommendations are to use hydrated or quick lime in amounts averaging around 4% of the soil's weight, with a slight variation allowed (± 0.5%). Similarly, lime by-products should be around 5%, with a variation of ± 1%. These percentages ensure that the soil's properties improve without overwhelming it with too much lime.
Examples & Analogies
Think of lime like seasoning in cooking; just the right amount enhances the flavor of the dish (soil), too little might not bring out the desired changes, while too much could ruin the recipe altogether.
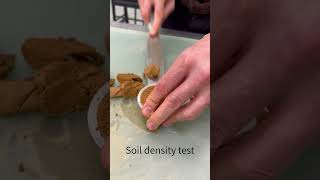
Mechanical and Physical Tests
Chapter 2 of 7
🔒 Unlock Audio Chapter
Sign up and enroll to access the full audio experience
Chapter Content
Perform mechanical and physical tests on the soils. Determine the separate pH of soil and lime samples.
Detailed Explanation
Before adding lime, it is crucial to test the soil's mechanical and physical properties. This includes evaluating its structure and composition. Additionally, measuring the pH level of both the soil and lime samples is essential because it helps in understanding how well they will interact. A high pH indicates a more alkaline environment, which is necessary for effective stabilization.
Examples & Analogies
Imagine testing the pH of water before adding plants; you want to ensure that the environment is suitable for growth (stabilization). If you add plants to water that's too acidic or too alkaline, they may not thrive, similar to how soil needs a balanced pH with the proper lime.
Eades and Grim pH Test
Chapter 3 of 7
🔒 Unlock Audio Chapter
Sign up and enroll to access the full audio experience
Chapter Content
Determine optimum lime content using Eades and Grim pH test. A sufficient amount of lime shall be added to soils to produce a pH of 12.4 or equal to the pH of lime itself...
Detailed Explanation
The Eades and Grim pH test is employed to find the right amount of lime to be added to the soil. The test involves adding lime until a pH of 12.4 is achieved, which is crucial for maximum lime-soil interaction. The peak pH signifies that the optimal lime content has been reached to stabilize the soil effectively. If the indicated pH does not reach this level, further tests with different amounts of lime may be required.
Examples & Analogies
Think of this process as fine-tuning a musical instrument. You keep adjusting until you hit the right note (pH level) — only then does the music (stabilized soil) sound just perfect.
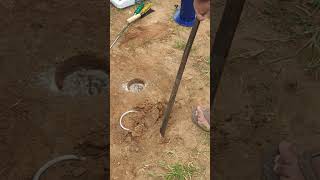
Sample Preparation and Mixing
Chapter 4 of 7
🔒 Unlock Audio Chapter
Sign up and enroll to access the full audio experience
Chapter Content
Representative samples of air-dried, minus No. 40 soil is equal to 20 g of oven-dried soil are weighed to the nearest 0.1 g and poured into 150-ml (or larger) plastic bottles with screw on tops...
Detailed Explanation
In this stage, approximately 20 grams of soil is prepared for testing by weighing it accurately and placing it into a bottle. Lime is then added in varying percentages (3%, 4%, 5%, 6%, and 7%). By shaking the mixture well, the lime and soil combine, which is critical for ensuring the lime can interact effectively once water is added. This ensures an accurate assessment of how the soil reacts to different lime contents.
Examples & Analogies
Consider this like preparing a smoothie. You need to measure out your ingredients accurately and blend them well to achieve the desired texture and flavor — that's how properly preparing soil-lime samples functions!
Measuring pH Post-Mixing
Chapter 5 of 7
🔒 Unlock Audio Chapter
Sign up and enroll to access the full audio experience
Chapter Content
After one hour, transfer part of the slurry to a plastic beaker and measure the pH. The pH meter must be equipped with a Hyalk electrode and standardized with a buffer solution having a pH of 12.00...
Detailed Explanation
After allowing the soil-lime mixture to settle and react for an hour, a pH measurement is taken using a specialized pH meter. This step is critical because it helps determine whether the lime content added has reached the intended pH, which is necessary for effective soil stabilization. Monitoring the pH changes guides adjustments, known as the reactive capabilities of the soil lime mixture.
Examples & Analogies
It’s like checking the temperature of a cake while it's baking — you need to make sure it reaches the right level to know if it's done. If it’s too low, just like the pH, you know you need to adjust (add more lime).
Atterberg Limits and Compaction Testing
Chapter 6 of 7
🔒 Unlock Audio Chapter
Sign up and enroll to access the full audio experience
Chapter Content
Atterberg limits should be performed on the soil-lime mixtures corresponding to optimum lime content as determined above. Compaction shall be performed in accordance with AASHTO T 99...
Detailed Explanation
Atterberg limits testing is a method to evaluate the plasticity characteristics of the lime-soil mixtures, providing insights into how the mixture behaves under various moisture conditions. Additionally, compaction testing, following the guidelines provided in AASHTO T 99, is conducted to assess how well the lime-soil mixture can be compacted into a stable form, informing future structural applications.
Examples & Analogies
This is similar to sculpting with clay — you need to know how the material behaves when wet (plastic limits) and how well it holds shape when dried (compaction). Understanding these properties optimizes how it will perform in real-world structures.
Standardized Testing Methods
Chapter 7 of 7
🔒 Unlock Audio Chapter
Sign up and enroll to access the full audio experience
Chapter Content
In the case of stabilization, the Unconfined Compression Test (AASHTO T 208) and California Bearing Ratio (AASHTO T 193, soaked) or resilient modulus (AASHTO T 307) tests at 95% compaction shall be performed...
Detailed Explanation
To evaluate the effectiveness of the lime-soil stabilization, standardized tests like the Unconfined Compression Test and California Bearing Ratio are conducted. These tests measure the strength and load-bearing capacity of the stabilized soil, crucial for determining whether the lime treatment successfully enhanced soil properties for construction applications.
Examples & Analogies
This process is akin to a final inspection for a newly built bridge. Just as engineers ensure it can handle expected weights and pressures, these tests ensure that the stabilized soil can withstand the stresses of construction and use.
Key Concepts
-
Lime Reaction: Lime improves soil properties through a chemical reaction.
-
pH Measurement: Critical for determining lime effectiveness in stabilization.
-
Optimum Lime Content: The ideal amount of lime required for maximum soil improvement.
Examples & Applications
Example of using lime to stabilize clay soils in road construction.
A comparison of soil properties before and after lime treatment, showing reduced plasticity.
Memory Aids
Interactive tools to help you remember key concepts
Rhymes
Lime saves the clay from a soggy day, making it strong in its own way.
Stories
Imagine a builder who needs to make a strong foundation. He finds the clay too soft, so he sprinkles lime like magic dust, strengthening the ground beneath him, securing the whole building.
Memory Tools
P.O.S. - pH, Organic content, Soil drainage - the key to lime's magic!
Acronyms
L.I.M.E - Lime Improves Material Edification.
Flash Cards
Glossary
- Lime Stabilization
A process where lime is added to soil to improve its physical properties.
- Eades and Grim pH Test
A method used to determine the optimum lime content by measuring the pH of the soil-lime mixture.
- Atterberg Limits
Tests conducted to determine the plasticity characteristics of soils.
- Compaction
The process of increasing soil density by reducing air gaps, often measured by standard tests like AASHTO T 99.
- California Bearing Ratio
A test used to evaluate the strength of subgrade soil under traffic loads.
Reference links
Supplementary resources to enhance your learning experience.