
Physical Prototyping
Enroll to start learning
You’ve not yet enrolled in this course. Please enroll for free to listen to audio lessons, classroom podcasts and take practice test.
Interactive Audio Lesson
Listen to a student-teacher conversation explaining the topic in a relatable way.
Introduction to Prototyping
🔒 Unlock Audio Lesson
Sign up and enroll to listen to this audio lesson

Welcome class! Today, we’re diving into the world of physical prototyping. Can anyone tell me why prototyping is important in product design?

It helps to test our ideas and see if they work in the real world!
Exactly, Student_1! Prototyping allows us to create tangible models of our designs to test and refine them. Now, there are two main types of prototypes: low-fidelity and high-fidelity. Who can define these?

Low-fidelity prototypes are simple models, like cardboard versions, right?
Correct! And what about high-fidelity prototypes?

Those are more advanced and look like the final product, using techniques like 3D printing.
Well done, everyone! So remember: low-fidelity prototypes are for quick exploration, and high-fidelity ones are for detailed testing.
Tools and Techniques in Prototyping
🔒 Unlock Audio Lesson
Sign up and enroll to listen to this audio lesson

Now, let’s talk about the tools and techniques. Who can name a tool used for creating prototypes?

3D printers are one of them!
Great! What’s the benefit of using a 3D printer?
They allow us to create complex shapes and get a close look at our designs quickly!
Exactly! Another tool is laser cutting. Can someone explain what laser cutting does?
It cuts shapes from materials very precisely!
Right! Both tools enhance our ability to prototype effectively. Consider how these might influence your designs when creating a prototype.
Testing Prototypes
🔒 Unlock Audio Lesson
Sign up and enroll to listen to this audio lesson
Testing is critical in the prototyping process. Why do you think testing prototypes is important?
To make sure our product is safe and works well!
Exactly! We gather feedback after testing against criteria such as usability and safety. What do we do with this feedback?
We use it to improve our designs through iterations.
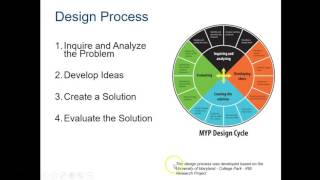
Correct! Iteration is key to refining our prototypes. So each prototype cycle should guide us closer to a successful final product.
Iterative Design Process
🔒 Unlock Audio Lesson
Sign up and enroll to listen to this audio lesson
Now, let's discuss why iteration is so important. Can anyone give an example of how iteration might work in prototyping?
If our prototype doesn’t grip objects well, we could adjust its design and make a new one.
Exactly! Each time we make adjustments based on testing feedback, we're iterating. How does this help in the bigger picture?
It ensures we end up with a product that really meets user needs!
Well said! Iteration leads to refined designs that enhance the overall user experience.
Introduction & Overview
Read summaries of the section's main ideas at different levels of detail.
Quick Overview
Standard
Physical prototyping is the process of creating tangible models of products, enabling designers to test form, function, and usability. It encompasses various types of prototypes, tools, and techniques, emphasizing the critical role of testing and iteration in the design process.
Detailed
Physical Prototyping: An Overview
Physical prototyping is a significant aspect of product design that bridges the gap between concept and realization. It involves creating tangible models to test product design aspects such as form, function, and usability prior to large-scale production. The process is categorized into two main types of prototypes:
- Low-Fidelity Prototypes: These are basic models made from materials like cardboard or foam that are used to explore shape and layout without detailed features. They are cost-effective and allow for quick iterations in the early stages of design.
- High-Fidelity Prototypes: These are more sophisticated models created using advanced techniques such as 3D printing, CNC machining, or electronic integration. High-fidelity prototypes closely resemble the final product and allow for in-depth testing of usability and functionality.
Tools and Techniques
To create prototypes, various tools and techniques are utilized:
- 3D Printing: This technology transforms digital designs into physical objects, allowing for intricate designs and rapid prototyping.
- Laser Cutting: Used for precision cutting of materials like wood, acrylic, or cardboard, laser cutting enables the creation of detailed prototype components.
- Hand Tools & Materials: Basic tools such as saws, soldering irons, and screwdrivers are essential for assembling prototype parts.
Testing and Feedback
A critical aspect of physical prototyping is the role of testing. Each prototype undergoes evaluation against predefined success criteria, focusing on performance, usability, and safety. Feedback collected during testing is used to refine designs, ensuring the final product meets user needs and functions effectively. Therefore, iteration based on testing results is a vital part of the prototyping process.
Youtube Videos

Audio Book
Dive deep into the subject with an immersive audiobook experience.
What is Prototyping?
Chapter 1 of 4
🔒 Unlock Audio Chapter
Sign up and enroll to access the full audio experience
Chapter Content
Prototyping is the process of creating a tangible model of a product to test its form, function, and usability before full-scale production.
Detailed Explanation
Prototyping involves making a physical representation of a product idea. This model allows designers to experiment with the product's appearance and how it works. It’s important because it helps identify potential problems early on, ensuring that the final product is effective and user-friendly.
Examples & Analogies
Imagine if a chef wanted to create a new dish. Instead of preparing a large meal right away, they might try cooking a small portion first to see how the flavors combine. If it doesn’t taste good, they can adjust the ingredients before serving it to everyone. Prototyping in product design works the same way.
Types of Prototypes
Chapter 2 of 4
🔒 Unlock Audio Chapter
Sign up and enroll to access the full audio experience
Chapter Content
Types of Prototypes:
• Low-Fidelity: Simple models made from cardboard, foam, or clay to explore shape and layout.
• High-Fidelity: More advanced versions using 3D printing, CNC machining, or electronics for near-final appearance and function.
Detailed Explanation
Prototypes can be categorized as low-fidelity or high-fidelity. Low-fidelity prototypes use basic materials like cardboard to quickly visualize concepts without investing too much time or money. High-fidelity prototypes, on the other hand, closely mimic the final product's look and functionality and are made with advanced tools. This helps in understanding user interaction with nearly complete models.
Examples & Analogies
When designing a new smartphone, a designer might first create a low-fidelity prototype using cardboard to visualize its shape and button placements. Later, they could create a high-fidelity prototype using 3D printing to see how the actual touchscreen responds and how users interact with the device.
Tools and Techniques for Prototyping
Chapter 3 of 4
🔒 Unlock Audio Chapter
Sign up and enroll to access the full audio experience
Chapter Content
Tools and Techniques:
• 3D Printing: Converts digital designs into plastic parts.
• Laser Cutting: Cuts precise shapes from wood, acrylic, or cardboard.
• Hand Tools & Materials: Saws, soldering irons, screwdrivers, etc., for assembling parts.
Detailed Explanation
Creating prototypes requires specific tools and techniques. 3D printing allows for the creation of intricate shapes from digital files, which can be very useful for testing fit and function. Laser cutting provides precision that can enhance the quality of prototypes made from various materials. Traditional hand tools are also essential for assembling different parts of a prototype to bring an idea together.
Examples & Analogies
Think of building a model airplane. First, you might use a 3D printer to create complex parts like the wings, then use a laser cutter for precise cuts on the body. Finally, you would use hand tools to put everything together, just like how designers combine various techniques to create prototypes.
The Role of Testing in Prototyping
Chapter 4 of 4
🔒 Unlock Audio Chapter
Sign up and enroll to access the full audio experience
Chapter Content
The Role of Testing:
Each prototype is tested against success criteria, including performance, usability, and safety. Feedback is gathered and used to refine the design.
Detailed Explanation
Testing prototypes is crucial to ensure they meet certain standards. This involves assessing how well the prototype works (performance), how easy it is to use (usability), and whether it is safe for users. After testing, designers collect feedback which allows them to make improvements, thus refining the product before it is launched.
Examples & Analogies
Consider a tech company launching a new laptop. Before selling it, they would give prototypes to users to gather feedback on how the laptop performs, whether it’s easy to use, and if there are any safety concerns like overheating. This feedback is invaluable for making changes and ensuring the final product is the best it can be.
Key Concepts
-
Prototyping: Creating physical models to test and refine product designs.
-
Low-Fidelity vs High-Fidelity: Different types of prototypes used at various design stages.
-
Importance of Tools: Techniques like 3D printing and laser cutting enhance the prototyping process.
-
Testing and Iteration: Gathering feedback and refining designs through multiple cycles.
Examples & Applications
Creating a cardboard model of a new ergonomic tool as a low-fidelity prototype to assess user comfort.
Using a 3D printer to produce a near-final version of a smart device for usability testing.
Employing laser cutting to construct precise components for a robotic system prototype.
Memory Aids
Interactive tools to help you remember key concepts
Rhymes
Prototypes we create, to test and iterate, both low and high, to find what's great.
Stories
Imagine a builder who starts with clay, shaping it into a model each day. With every review, changes unfold, creating designs that are strong and bold.
Memory Tools
Remember PIRT for Prototyping: Prototyping, Iteration, Review, Test.
Acronyms
P.H.E.T - Prototyping, High-Fidelity, Evaluation, Testing
Flash Cards
Glossary
- Prototyping
The process of creating tangible models of a product to test its form, function, and usability.
- LowFidelity Prototype
Basic models made from simple materials like cardboard or foam to explore ideas and layouts.
- HighFidelity Prototype
Advanced models that resemble the final product, often using 3D printing and other technologies.
- 3D Printing
A fabrication process that creates physical objects from digital designs.
- Laser Cutting
A technique that cuts materials with precision using a laser.
- Iteration
The process of refining a design through repeated cycles of prototyping and testing.
Reference links
Supplementary resources to enhance your learning experience.