
Experimental Study of Photoelectric Effect
Enroll to start learning
You’ve not yet enrolled in this course. Please enroll for free to listen to audio lessons, classroom podcasts and take practice test.
Interactive Audio Lesson
Listen to a student-teacher conversation explaining the topic in a relatable way.
Setup of the Experiment
🔒 Unlock Audio Lesson
Sign up and enroll to listen to this audio lesson

Let's begin with the setup used to study the photoelectric effect. We have an evacuated glass tube with two metal plates; one is the emitter and the other is the collector. Can anyone tell me why we use an evacuated tube?

To prevent air from interfering with the movement of electrons!
Exactly! By removing air, we minimize collision chances for the emitted electrons. Now, light of a certain wavelength shines onto the emitter plate. Let's discuss what happens next.

The light causes electrons to be emitted from the emitter plate, right?
Yes! Those emitted electrons are what we measure as photocurrent. Remember, the light must have sufficient frequency to overcome the material’s work function. There’s a mnemonic to help you remember: 'LEAP'—Light Energy Against Pull.

What if the light's frequency is too low?
Good question! If the frequency is below the threshold, no electrons will be emitted, regardless of the light's intensity. Let's summarize this setup: 1) Evacuated tube prevents air interference, 2) Correct frequency of light is necessary to emit electrons.
Effects of Light Intensity on Photocurrent
🔒 Unlock Audio Lesson
Sign up and enroll to listen to this audio lesson

Now, let’s examine the effect of light intensity on the photocurrent. Who can explain what we observe when we increase the intensity of light?

The photocurrent increases!
Correct! The photocurrent is proportional to the number of photoelectrons emitted per second. We can remember 'More Light, More Electrons' as a guideline here.
So, if we have a very intense light but at a low frequency, could we still get a high photocurrent?
Not at all! The frequency still needs to be above the threshold for any emission to happen. Always think of frequency before intensity.
And what’s the relationship with maximum kinetic energy?
The kinetic energy of emitted electrons does not depend on intensity but rather on the frequency of the light. Energy drawn from light increases with frequency, not how bright it is; remember that with the acronym 'K.E. is F, not I', where F stands for Frequency.
So, the higher the frequency, the more energy each electron has?
Exactly! Summarizing: Higher intensity equals higher photocurrent, but energy per electron depends on frequency. No photons, no current at low frequencies.
Effects of Potential on Photoelectric Current
🔒 Unlock Audio Lesson
Sign up and enroll to listen to this audio lesson
Now, let’s discuss the effects of applying potentials to the setup. What happens when we increase the positive potential on the collector plate?
The photocurrent should increase, right?
Correct! As we attract more electrons with higher potential, the photocurrent increases until it reaches a saturation point.
What does saturation mean in this context?
Saturation current indicates that all emitted electrons are being collected. At this point, adding more potential doesn’t increase the current. 'Saturation Stops Collection' can help you remember this feature.
And if we apply a negative potential?
Then we repel electrons. There’s a specific stopping potential at which all photoelectrons fail to reach the collector. It illustrates the need for a minimum kinetic energy to overcome this barrier. Remember: 'Negative Negates Electrons' for this condition.
Summarizing that, we attract until saturation with a positive potential and stop electrons with a negative potential?
Exactly! That's a good recap of how potential affects photocurrent.
Effect of Frequency on Stopping Potential
🔒 Unlock Audio Lesson
Sign up and enroll to listen to this audio lesson
Finally, let’s explore how frequency affects stopping potential. What do you think will happen if we assess different frequencies of light?
The stopping potential will vary!
Precisely! Higher frequencies result in higher stopping potentials because the emitted electrons have maximum kinetic energy associated with that frequency. Always remember: 'Higher Frequency, Higher Energy'.
So even if the intensities are the same, the stopping potential changes?
Exactly! The stopping potential depends solely on frequency and not on intensity. Think of it this way: 'Intensity Counts, But Energy Decides'.
What about the effect of frequency below the threshold?
No emission occurs; thus, zero stopping potential. Remember: 'Threshold Blocks Emission'. To summarize: stopping potential rises with frequency, independently of intensity.
Introduction & Overview
Read summaries of the section's main ideas at different levels of detail.
Quick Overview
Standard
The section details an experimental setup for the photoelectric effect, highlighting the relationships between photocurrent, light intensity, frequency, and stopping potential. It discusses key findings regarding how electron emission varies with these parameters.
Detailed
Experimental Study of Photoelectric Effect
The photoelectric effect is a phenomenon where electrons are emitted from a metal when it is illuminated by light of suitable frequency. This section describes the experimental setup used to study this effect, including a schematic diagram of the apparatus consisting of two metal plates and a light source. By varying the intensity and frequency of the incident light, as well as the voltage between the plates, key observations are made:
- Effect of Intensity: The photoelectric current is directly proportional to the intensity of incident light, indicating that more light results in more emitted photoelectrons.
- Effect of Potential: The current increases with increasing positive potential on the collector plate until it reaches a saturation point, beyond which further increases do not affect the current.
- Effect of Frequency: Different frequencies of light yield different stopping potentials, confirming that the energy of the emitted electrons correlates with the frequency of the incident light. A minimum threshold frequency exists below which no emission occurs, irrespective of the light intensity.
The experimental study underscores the importance of both light properties and material characteristics in the photoelectric effect, laying the groundwork for understanding the quantum nature of light and matter.
Youtube Videos


Audio Book
Dive deep into the subject with an immersive audiobook experience.
Experimental Setup Description
Chapter 1 of 10
🔒 Unlock Audio Chapter
Sign up and enroll to access the full audio experience
Chapter Content
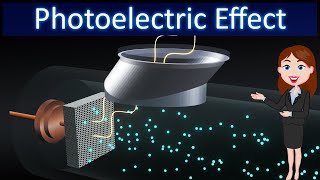
Figure 11.1 depicts a schematic view of the arrangement used for the experimental study of the photoelectric effect. It consists of an evacuated glass/quartz tube having a thin photosensitive plate C and another metal plate A. Monochromatic light from the source S of sufficiently short wavelength passes through the window W and falls on the photosensitive plate C (emitter). A transparent quartz window is sealed on to the glass tube, which permits ultraviolet radiation to pass through it and irradiate the photosensitive plate C. The electrons are emitted by the plate C and are collected by the plate A (collector), by the electric field created by the battery.
Detailed Explanation
This chunk introduces the experimental apparatus used to study the photoelectric effect. The setup consists of a sealed tube containing two metal plates: one is a photosensitive plate (plate C) and the other is a collector plate (plate A). When light, specifically ultraviolet light, shines onto the photosensitive plate, electrons are emitted due to the photon energy hitting the surface. These emitted electrons are then attracted to the collector plate due to an electric field created by a battery, allowing for the measurement of the resulting electric current.
Examples & Analogies
Think of this setup like a 'light-triggered gate.' When light (the key) shines on the gate (the photosensitive plate), it opens up to let tiny particles (electrons) flow through and reach the collector (the other plate), where we can measure how many particles got through, just like counting people through a door.
Measuring Photoelectric Current
Chapter 2 of 10
🔒 Unlock Audio Chapter
Sign up and enroll to access the full audio experience
Chapter Content
The battery maintains the potential difference between the plates C and A, that can be varied. The polarity of the plates C and A can be reversed by a commutator. Thus, the plate A can be maintained at a desired positive or negative potential with respect to emitter C.
Detailed Explanation
In this part of the experiment, the potential difference between the two plates can be controlled and adjusted. By altering the potential, we can either attract or repel the emitted electrons. This setup allows us to investigate how changing the voltage affects the flow of electrons, which we observe as the photoelectric current. By reversing the polarity, we can study the electrons' behavior under different electrical conditions.
Examples & Analogies
Imagine a playground slide where kids can go down. If the slide is inclined (positive potential), kids slide down easily (electrons are attracted). But if we try to push them back up (negative potential), only the stronger kids (more energetic electrons) can reach the top. This explains how potential difference influences electron movement in our light experiment.
Effect of Light Intensity on Photoelectric Current
Chapter 3 of 10
🔒 Unlock Audio Chapter
Sign up and enroll to access the full audio experience
Chapter Content
We can use the experimental arrangement to study the variation of photocurrent with (a) the intensity of radiation, (b) frequency of incident radiation, (c) the potential difference between the plates A and C, and (d) the nature of the material of plate C.
Detailed Explanation
This chunk discusses the various parameters that can be adjusted in the experiment to see their effects on the photoelectric current. The intensity of light is particularly important; as we increase the intensity (meaning more photons hit the surface), we observe more electrons being emitted per unit of time. This relationship is framed as an investigation into how different factors influence the photoelectric effect.
Examples & Analogies
Think of watering plants: if you pour more water (increased intensity), more plants (photoelectrons) will get the water. Similarly, with brighter light, more electrons are set free, directly increasing the current measured.
Intensity and Photoelectric Current Relationship
Chapter 4 of 10
🔒 Unlock Audio Chapter
Sign up and enroll to access the full audio experience
Chapter Content
It is found that the photocurrent increases linearly with intensity of incident light. The photocurrent is directly proportional to the number of photoelectrons emitted per second.
Detailed Explanation
This observation indicates a direct relationship between light intensity and photoelectric current. If the light intensity doubles, the number of emitted electrons and, consequently, the photoelectric current also doubles. This linear relationship signifies that more light equals more emitted electrons, reinforcing the concept that light intensity directly affects the rate of emission.
Examples & Analogies
This can be likened to a vending machine: the more coins you put in (higher intensity of light), the more snacks you get (more photoelectrons emitted). Each coin triggers the machine to give out a snack, just as each photon can cause the release of an electron.
Effect of Collector Plate Potential on Current
Chapter 5 of 10
🔒 Unlock Audio Chapter
Sign up and enroll to access the full audio experience
Chapter Content
The photoelectric current increases with increase in positive (accelerating) potential. At some stage, for a certain positive potential of plate A, all the emitted electrons are collected by the plate A and the photoelectric current becomes maximum or saturates.
Detailed Explanation
This section describes how changing the potential of the collector plate affects the current. Initially, as we increase the positive potential (collecting plate more positive), we see an increase in the measured current due to more electrons being collected. However, a maximum point is reached where all emitted electrons are captured; beyond this, increasing the potential does not increase the current further, leading to saturation.
Examples & Analogies
Consider a water faucet: as you turn the knob (increase potential), more water (electrons) flows out until you reach the maximum flow possible. Turning the knob further doesn’t make more water come out than what the faucet can deliver.
Stopping Potential and Electron Collection
Chapter 6 of 10
🔒 Unlock Audio Chapter
Sign up and enroll to access the full audio experience
Chapter Content
If we increase the accelerating potential of plate A further, the photocurrent does not increase. This maximum value of the photoelectric current is called saturation current.
Detailed Explanation
This chunk explains that once saturation current is reached, increasing the collection potential does not result in a higher photocurrent. Instead, all the emitted photoelectrons have already been collected. The concept of stopping potential relates to how we can repel the photoelectrons to study their energies by reversing the collection plate's voltage.
Examples & Analogies
Imagine a stadium crowd (photoelectrons) where all the fans (electrons) leave through one exit (collector plate). Once all fans are out, no matter how much more you call them back (increase potential), no more fans can exit until others arrive (more emitted electrons).
Independence of Stopping Potential from Intensity
Chapter 7 of 10
🔒 Unlock Audio Chapter
Sign up and enroll to access the full audio experience
Chapter Content
Thus, for a given frequency of the incident radiation, the stopping potential is independent of its intensity.
Detailed Explanation
This observation highlights that the stopping potential only depends on the frequency of the incident light, not its intensity. This means that the maximum energy of emitted electrons is determined by the color (frequency) of the light rather than how bright or intense it is.
Examples & Analogies
This can be compared to trying to elevate a ball over a hill: no matter how hard you throw it (intensity), it must still exceed a certain height (frequency or energy) to go over. If the ball doesn't have enough initial speed (energy), it won't make it, regardless of your effort.
Threshold Frequency Concept
Chapter 8 of 10
🔒 Unlock Audio Chapter
Sign up and enroll to access the full audio experience
Chapter Content
There exists a certain minimum cut-off frequency of the incident radiation, called the threshold frequency, below which no emission of photoelectrons takes place, no matter how intense the incident light is.
Detailed Explanation
The threshold frequency is the minimum frequency (or maximum wavelength) of light required to initiate the photoelectric effect. Below this frequency, even if the radiation is very intense, no electrons will be emitted from the metal surface. This establishes a critical boundary for the emission of photoelectrons based on the light's frequency.
Examples & Analogies
Think of unlocking a door with a specific key: no matter how much you push against the door (intensity), it won’t open without the correct key (threshold frequency).
Instantaneous Emission of Photoelectrons
Chapter 9 of 10
🔒 Unlock Audio Chapter
Sign up and enroll to access the full audio experience
Chapter Content
It is found that, if frequency of the incident radiation exceeds the threshold frequency, the photoelectric emission starts instantaneously without any apparent time lag, even if the incident radiation is very dim.
Detailed Explanation
This section indicates that once the incident light surpasses the threshold frequency, electrons are emitted almost immediately. This rapid response contradicts the classical idea that light would need time to accumulate energy before releasing electrons. Instead, the photoelectric effect appears to be a direct interaction without delay.
Examples & Analogies
This is like flipping a switch in a dark room: as soon as you flip it (radiation with sufficient frequency), the lights turn on instantly. There’s no waiting period before the room is illuminated; similarly, electrons are emitted immediately once the right conditions are met.
Summary of Experimental Features
Chapter 10 of 10
🔒 Unlock Audio Chapter
Sign up and enroll to access the full audio experience
Chapter Content
We now summarise the experimental features and observations described in this section.
Detailed Explanation
In this concluding chunk, the key findings from the experiment are reiterated. These include direct relationships between photocurrent and light intensity, the independence of stopping potential from intensity, and the critical nature of threshold frequency in the emission of photoelectrons. Understanding these features emphasizes the differences between classical and quantum views of light.
Examples & Analogies
Imagine studying for a test: your success (photoelectric emission) depends not just on how hard you study (intensity) but also on understanding the subject's basics (threshold frequency). Without grasping the key concepts, even the best efforts won't yield results.
Key Concepts
-
Photoelectric Effect: The emission of electrons caused by light.
-
Photocurrent: The current generated from the emitted electrons.
-
Work Function: The minimum energy necessary for electron emission.
-
Stopping Potential: The potential required to halt the emitted electrons effectively.
Examples & Applications
When ultraviolet light strikes a zinc plate, electrons are ejected, demonstrating the photoelectric effect.
By measuring how much light intensity affects photocurrent in an experiment, one can establish the proportional relationship between these two variables.
Memory Aids
Interactive tools to help you remember key concepts
Rhymes
To make electrons flee, just shine the light with glee!
Stories
Imagine a game where light unlocks a door; only the right frequency allows electrons to explore.
Memory Tools
Remember 'L.E.A.P'—Light Energy Against Pull—to recall how light gets electrons to escape.
Acronyms
P.E. - Photoelectric Effect signifies how light (P) can elevate electrons (E).
Flash Cards
Glossary
- Photoelectric Effect
The phenomenon of the emission of electrons from a material when it absorbs light of sufficient energy.
- Work Function
The minimum energy needed to remove an electron from a metal surface.
- Threshold Frequency
The minimum frequency of light required to emit electrons from a metal.
- Photocurrent
The electric current generated by the photoelectric effect due to emitted electrons.
- Stopping Potential
The reverse potential applied to stop the flow of photoelectrons emitted from the emitter.
Reference links
Supplementary resources to enhance your learning experience.