
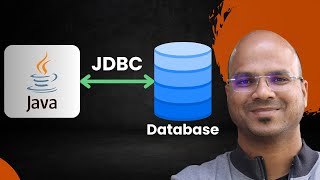
Basic Steps in JDBC Programming
Enroll to start learning
You’ve not yet enrolled in this course. Please enroll for free to listen to audio lessons, classroom podcasts and take practice test.
Interactive Audio Lesson
Listen to a student-teacher conversation explaining the topic in a relatable way.
Importing the JDBC Package
🔒 Unlock Audio Lesson
Sign up and enroll to listen to this audio lesson

Let's start with the first step in JDBC programming, which is importing the JDBC package. This package contains the necessary classes for implementing database operations. Can anyone tell me what specific classes we might need from this package?

I think we need the `Connection`, `Statement`, and `ResultSet` classes among others.
Exactly! Those classes are fundamental for handling connections and executing queries. Remember, the import statement looks like this: `import java.sql.*;`. It brings in all SQL-related functionalities into your program!

What happens if we forget to import the package?
Good question! If you don't import the package, the compiler won't recognize the JDBC classes, and you'll get errors. Always remember to include the necessary imports!
To summarize, the first step is crucial; without the import, the rest cannot function. Now, what’s the next step?
Loading and Registering the Driver
🔒 Unlock Audio Lesson
Sign up and enroll to listen to this audio lesson

Next is loading and registering the driver. Can anyone explain why this step is important?

Isn't it necessary to make sure the Java application communicates with the database?
Exactly! We use `Class.forName()` method to load the database driver. This step is crucial especially for older versions of JDBC. What's interesting is that since JDBC 4.0, drivers can be automatically loaded.

Can you give us an example of how to write that in code?
Sure! You would write `Class.forName("com.mysql.cj.jdbc.Driver");`. And generally, it is located in the JDBC Driver's jar file. Remember to handle exceptions when doing this!
To recap, loading the driver ensures that your application can communicate with the database, particularly vital in different database setups.
Establishing a Connection
🔒 Unlock Audio Lesson
Sign up and enroll to listen to this audio lesson
Now, let’s talk about establishing a connection to the database. What key components do we need for this?
We need the database URL, username, and password.
Correct! We use `DriverManager.getConnection(url, username, password)` to create our connection object. Retaining the URL format is important. Does anyone remember the format for a MySQL URL?
It’s something like `jdbc:mysql://localhost:3306/database_name`.
Spot on! The port `3306` is typical for MySQL databases. And never forget to wrap this in a try-catch block to handle exceptions gracefully! Can anyone think of why we can't skip error handling during this step?
Because if the database is down or credentials are wrong, we need to know why the connection failed, right?
Absolutely! That's why proper error handling is paramount. In summary, establishing a connection requires key credentials and meticulous error handling.
Executing SQL Queries
🔒 Unlock Audio Lesson
Sign up and enroll to listen to this audio lesson
Now let's delve into executing SQL queries. What are the main interfaces we use for this?
We primarily use `Statement`, `PreparedStatement`, and `CallableStatement`.
Exactly! The `Statement` interface is for static queries, while `PreparedStatement` is for parameterized ones. Which is safer and why?
Prepared statements are safer against SQL injection attacks because they handle query parameters differently.
Perfect! You can execute results with `executeQuery()` or `executeUpdate()` for retrieval and modification respectively. Remember, processing results is the next step! Can anyone summarize why we use both types of statements?
We use them based on the need for dynamic inputs and security against potential SQL threats.
Exactly! Diversity in statements allows us to balance efficiency with security. Let's connect back to this after we process the results.
Closing the Connection
🔒 Unlock Audio Lesson
Sign up and enroll to listen to this audio lesson
Finally, let’s discuss closing the connection. Why is this an essential step?
If we don’t close connections, we could run out of resources, right?
Exactly! Not closing connections can lead to resource leaks that slow down or crash your application. Always use the `close()` method. Can anyone elaborate on when to close resources during the application lifecycle?
We should close them in a finally block or use try-with-resources to ensure they close automatically.
Well said! The try-with-resources statement is the best practice as it ensures resources are closed without needing to explicitly call `close()`. To summarize, closing connections helps maintain efficiency and resource integrity in your application.
Introduction & Overview
Read summaries of the section's main ideas at different levels of detail.
Quick Overview
Standard
This section enumerates the essential steps required for JDBC programming, covering everything from importing necessary packages to closing database connections, which is crucial for effective database interactions in Java applications.
Detailed
Basic Steps in JDBC Programming
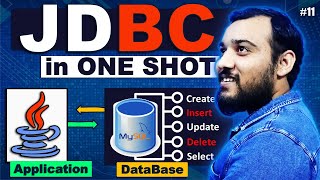
To effectively utilize JDBC (Java Database Connectivity) in Java applications, developers must follow a series of steps to ensure successful interaction with relational databases. The procedures include importing the JDBC package, loading the appropriate database driver, establishing a database connection, and executing SQL queries. Each step is vital for database operations and showcases the framework's ability to manipulate data securely and efficiently.
Key Steps in JDBC Programming:
- Import JDBC Package: Before any database operations, ensure you import the Java SQL package which contains essential classes and interfaces for JDBC.
- Load and Register the Driver: Use
Class.forName()to dynamically load the database driver. This step can be optional in JDBC 4.0 and beyond, as drivers can be auto-registered. - Establish a Connection: Utilize
DriverManager.getConnection()to create a connection to the database using a valid URL, username, and password. - Create a Statement: After establishing a connection, create a
Statementobject for sending SQL commands to the database. - Execute SQL Queries: Use the statement object to execute SQL queries (e.g., SELECT, INSERT, UPDATE, DELETE).
- Process the Results: Gather the results using the
ResultSetobject which holds the data returned by the executed queries. - Close the Connection: Finally, it's important to close the
ResultSet,Statement, andConnectionobjects to free up resources.
These steps provide a solid foundation for implementing database interactions in Java, integral for building robust applications relying on persistent data storage.
Youtube Videos


Audio Book
Dive deep into the subject with an immersive audiobook experience.
Import the JDBC Package
Chapter 1 of 7
🔒 Unlock Audio Chapter
Sign up and enroll to access the full audio experience
Chapter Content
- Import the JDBC package
Detailed Explanation
The first step in JDBC programming is to import the necessary JDBC classes from the package. This typically involves including the statement import java.sql.*; at the beginning of your Java code. This import allows you to access classes for managing database connections, executing SQL statements, and processing results.
Examples & Analogies
Think of this step like getting the tools you need before starting a project. Just as a carpenter needs to gather their tools (like saws, hammers, etc.) before building furniture, you need to import the JDBC package to access the functionalities required for database interaction.
Load and Register the Driver
Chapter 2 of 7
🔒 Unlock Audio Chapter
Sign up and enroll to access the full audio experience
Chapter Content
- Load and register the driver
Detailed Explanation
Next, you need to load the appropriate JDBC driver for your database. This is done using the Class.forName method, like Class.forName("com.mysql.cj.jdbc.Driver");. This step registers the driver so that JDBC can communicate effectively with the database you're using. Although loading the driver is optional from JDBC 4.0 onward, it's good practice to include it.
Examples & Analogies
Consider this step as turning on the electricity before using your appliances. Without electricity, none of the devices would work, just as without the registered driver, your JDBC code can't connect to the database.
Establish a Connection
Chapter 3 of 7
🔒 Unlock Audio Chapter
Sign up and enroll to access the full audio experience
Chapter Content
- Establish a connection
Detailed Explanation
Once the driver is loaded, you need to establish a connection to the database using the DriverManager class. This is done with a method like DriverManager.getConnection(url, username, password); where 'url' specifies the database location, 'username' refers to your database username, and 'password' is your database password. If successful, this establishes a session with the database.
Examples & Analogies
Establishing a connection is similar to opening a door to a room. You need the right key (username and password) to get inside. Once the door is open, you can interact with what's inside the room (the database).
Create a Statement
Chapter 4 of 7
🔒 Unlock Audio Chapter
Sign up and enroll to access the full audio experience
Chapter Content
- Create a statement
Detailed Explanation
With a successful connection established, the next step is to create a Statement object. This is important because the Statement is what you’ll use to send SQL commands to the database. You can create a statement with the connection object, like Statement stmt = con.createStatement();.
Examples & Analogies
Creating a statement is akin to acquiring a pen and paper to write a letter. The statement allows you to 'write' SQL commands to communicate with the database effectively, just as a pen allows you to write to someone.
Execute SQL Queries
Chapter 5 of 7
🔒 Unlock Audio Chapter
Sign up and enroll to access the full audio experience
Chapter Content
- Execute SQL queries
Detailed Explanation
After creating a statement, you can execute SQL queries to perform operations such as selecting, inserting, updating, or deleting data from the database. You use the statement's methods like executeQuery for fetching data and executeUpdate for modifications. For example, ResultSet rs = stmt.executeQuery("SELECT * FROM students"); fetches all records from the 'students' table.
Examples & Analogies
Executing SQL queries is like sending a request for information or action to a friend. For instance, if you ask a friend to find a book in a library (execute a query), they go and look it up for you, just like a query fetches data from the database.
Process the Results
Chapter 6 of 7
🔒 Unlock Audio Chapter
Sign up and enroll to access the full audio experience
Chapter Content
- Process the results
Detailed Explanation
Once queries are executed, you need to process the results returned from the database, which is typically done using a ResultSet object. This allows you to iterate over the data retrieved. You can use methods like next(), getInt(), or getString() to access the results.
Examples & Analogies
Processing results is like going through the answers your friend brought back after checking the library. You read through the information, perhaps writing down notes about what you found, similar to accessing data from the ResultSet.
Close the Connection
Chapter 7 of 7
🔒 Unlock Audio Chapter
Sign up and enroll to access the full audio experience
Chapter Content
- Close the connection
Detailed Explanation
The final step is to close the connection to the database to free up resources. This is done using the close() method on the connection, statement, and result set objects. Not closing these connections can lead to memory leaks and other issues in your application.
Examples & Analogies
Closing the connection is similar to locking the door after leaving a room. By doing so, you ensure that no one else can enter without permission, and it keeps the space secure and tidy.
Key Concepts
-
Import JDBC Package: Essential to bring SQL classes into scope.
-
Load and Register Driver: Allows communication with the database driver.
-
Establish Connection: Vital for creating a bridge between code and database.
-
Create Statement: Required for executing SQL commands.
-
Execute SQL Queries: Involves sending commands to the database.
-
Process Results: Extracting data from the ResultSet.
-
Close Connection: Important to avoid resource leaks.
Examples & Applications
Importing MySQL JDBC Driver: import java.sql.*;.
Establishing connection: Connection con = DriverManager.getConnection(url, username, password);.
Executing a query: Statement stmt = con.createStatement(); ResultSet rs = stmt.executeQuery("SELECT * FROM users");.
Memory Aids
Interactive tools to help you remember key concepts
Rhymes
To connect to a database, first import, then load, / Establish your connection to lighten the load.
Stories
Imagine you are a librarian, needing to find a book; you first gather your tools (import), then head to the library (load the driver), find a seat (connect), and finally open the book (execute queries).
Memory Tools
I. L. C. S. E. C.: Import, Load Driver, Create Statement, Execute SQL, Close Connection.
Acronyms
JDBC
Java Database Connectivity - remember it for seamless database connection!
Flash Cards
Glossary
- JDBC
Java Database Connectivity, an API in Java for connecting and executing queries with databases.
- Connection
An object in JDBC that represents a connection to a specific database.
- Statement
An object that allows you to execute SQL queries in JDBC.
- PreparedStatement
A precompiled SQL command that can accept input parameters, improving performance and security.
- ResultSet
An object that holds data retrieved from a database after executing a query.
Reference links
Supplementary resources to enhance your learning experience.