
DRAWING TOOLS
Enroll to start learning
You’ve not yet enrolled in this course. Please enroll for free to listen to audio lessons, classroom podcasts and take practice test.
Interactive Audio Lesson
Listen to a student-teacher conversation explaining the topic in a relatable way.
Line Command
🔒 Unlock Audio Lesson
Sign up and enroll to listen to this audio lesson

Today, we're going to start with the Line Command. Can anyone tell me what the command is and how we use it?

The command is LINE, and we can use it to create straight line segments.
Exactly! How do we specify the points to create lines?

We input the start and end points of the line.
"Correct! Remember, when we use the ORTHO feature, we can restrict movements to horizontal or vertical. Let's summarize: **LINE Command = L**. You can think of it this way:
Circle Command
🔒 Unlock Audio Lesson
Sign up and enroll to listen to this audio lesson

Now, let's shift to the Circle command. Can someone tell me how many methods there are to create a circle?

I believe there are several methods, like center and radius, center and diameter, and even tangent circles!
Absolutely! Let's remember: **C** for **Circle**. When you think of drawing circles, think of the letter **C**! What are some methods you find useful?

The center and radius method is straightforward, especially for defining the size of the circle.
Great insight! Always keep that method in mind!
Polyline Tech
🔒 Unlock Audio Lesson
Sign up and enroll to listen to this audio lesson
Next, let's talk about Polylines. What's the primary advantage of using a Polyline over individual lines?
Polylines act as a single object, right? It makes editing easier!
Exactly! So remember: **P** for **Polyline**. When you create a series of connected lines, think of the ease it brings. What’s another feature of polylines?
We can also specify the width of the polyline segments!
Correct! That's a powerful feature for designs requiring varying widths.
Modify Commands
🔒 Unlock Audio Lesson
Sign up and enroll to listen to this audio lesson
Finally, let’s focus on some modify tools. Could you all name a few and their purposes?
Commands like ERASE, COPY, and OFFSET are essential for modifying shapes.
Good! Creating copies can expedite the design process. Do you remember any keywords to help you memorize these commands?
E for erase, C for copy…
Exactly! It’s all about those first letters. Remember them as a waterfall of tools: **M** for **Modify**!
Introduction & Overview
Read summaries of the section's main ideas at different levels of detail.
Quick Overview
Standard
This section discusses various drawing tools utilized in computer-aided design (CAD) software, including commands to create lines, circles, arcs, polylines, and various modifications to these shapes. Understanding these tools is crucial for effective architectural planning and drawing.
Detailed
Detailed Summary of Drawing Tools in CAD
In this section, we explore an extensive range of drawing tools and commands vital for computer-aided design (CAD) applications used in architectural planning. Key commands include:
A. Line Command
- Command:
LINEorL - Function: Creates a series of straight line segments, where each segment is a separate object.
- Usage: Users can specify start and end points to create lines in various directions.
B. Circle Command
- Command:
CIRCLEorC - Function: Creates a circle using various methods including center-radius, center-diameter, and tangent options.
C. Arc Command
- Command:
ARCorA - Function: Draws an arc defined by points or center specifications, adding curved segments to drawings.
D. Polyline Command (Pline)
- Command:
PLINEorPL - Function: Creates a series of connected line segments as a single object, with controlled widths.
E. Mline Command
- Command:
MLINEorml - Function: Creates sets of parallel lines with adjustable properties.
F. Polygon Command
- Command:
POLYGONorpol - Function: Creates regular polygons with specified sides and lengths.
G. Rectangle Command
- Command:
RECTANGLEorrec - Function: Draws rectangles as singular objects, facilitating straightforward constructions.
H. Spline Command
- Command:
SPLINEorspl - Function: Draws smooth curves through specified points.
I. Ellipse Command
- Command:
ELLIPSEorel - Function: Draws an ellipse using three designated points.
J. Modify Tools
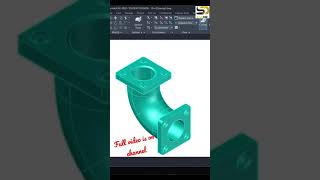
Includes tools like ERASE, COPY, MIRROR, OFFSET, ARRAY, MOVE, ROTATE, SCALE, STRETCH, TRIM, EXTEND, BREAK, CHAMFER, and FILLET for altering existing objects. Each command has specific usage scenarios for effective drawing modifications.
Understanding and mastering these commands equip users with the necessity to create complex designs efficiently in CAD software.
Youtube Videos


Audio Book
Dive deep into the subject with an immersive audiobook experience.
Line Command
Chapter 1 of 7
🔒 Unlock Audio Chapter
Sign up and enroll to access the full audio experience
Chapter Content
A. LINE COMMAND:
It creates one or series of straight line segments here each line segment is a separate object.
COMMAND: LINE or L (PRESS ENTER)
- From point: 10, 10
- To point: (Move the cursor horizontally to right with ortho ON) type 20, press enter.
- To point: (Move the cursor horizontally up) type 20, press enter.
- To point: (Move the cursor horizontally to left) type 20, press enter.
- To point: c.
Detailed Explanation
The Line Command in CAD software is used to draw straight lines. Each line segment you create is treated as an individual element, which means they can be edited separately. You initiate the command by typing 'LINE' or just 'L' and pressing Enter. After that, you specify the starting point for your line (for example, at coordinates 10, 10). You then dictate where the line extends by providing the endpoint coordinates. By following the steps mentioned, you can draw lines in various directions: right, up, left, and close the shape using 'c'.
Examples & Analogies
Think of drawing lines in CAD like drawing a path on a piece of paper. You start at a point, decide how far and in which direction to go, and then make your next turn at right angles until you've created your desired design, similar to navigating a map.
Circle Command
Chapter 2 of 7
🔒 Unlock Audio Chapter
Sign up and enroll to access the full audio experience
Chapter Content
B. CIRCLE COMMAND:
It creates a circle.
- CENTER AND RADIUS: Draw a circle based on a center point and radius.
- CENTER AND DIAMETER: Draw a circle based on a center point and diameter.
- THREE POINT (3P) CIRCLE: Draw a circle based on 3 points on the circumference.
- TWO POINT (2P) CIRCLE: Draw a circle based on two points of a diameter.
- TANGENT TANGENT RADIUS: Draw a circle tangent to an existing object with a specified radius.
COMMAND: CIRCLE or C.
Detailed Explanation
The Circle Command allows you to create perfect circular shapes in your drawing. You can specify how to draw the circle by using different methods: by defining a center point and either a radius or diameter, or by using three points on the circumference to establish the circle's size. Additionally, if you need to position the circle relative to other objects, you can use the Tangent Tangent Radius option, which allows the circle to touch existing shapes while maintaining a specified radius.
Examples & Analogies
Imagine you’re drawing a pizza. You can have a specific center point (like the center of the pizza) and decide how large you want it to be (radius) or how long to make the crust (diameter). Or, if you’re really hungry, you might want three friends to hold up points around the pizza to help you outline your perfect pie!
Arc Command
Chapter 3 of 7
🔒 Unlock Audio Chapter
Sign up and enroll to access the full audio experience
Chapter Content
C. ARC COMMAND:
It creates an arc and is used to add curved segments to the drawing.
- THREE POINT ARC: Draws an arc using three specified points on the circumference.
COMMAND: ARC or A.
Detailed Explanation
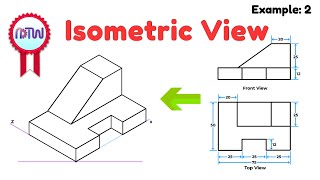
The Arc Command is useful for creating curves within your drawings. You can create an arc by specifying three points that define its shape. The first point is the start of the arc, the second point helps to shape the arc, and the third point ends the arc. This allows the arc to fit smoothly into the design.
Examples & Analogies
Think of drawing an arc as if you were drawing the top of a rainbow. You start at one point, decide how high or low you want the arc to rise, and determine where it will end. The three points you choose create that beautiful curve, just like the way a rainbow forms in the sky.
Polyline Command
Chapter 4 of 7
🔒 Unlock Audio Chapter
Sign up and enroll to access the full audio experience
Chapter Content
D. PLINE COMMAND (POLY LINE):
Polyline is a series of connected line segments created as one object. The width of the object can be controlled.
COMMAND: PLINE or PL.
Detailed Explanation
The Polyline Command allows you to create shapes made of multiple connected straight line segments and/or arcs. It essentially combines them into a single object that you can manipulate as one. You can adjust the width and shape of the polyline, which makes it particularly useful for custom designs where you want consistency across all segments.
Examples & Analogies
Imagine you are drawing a path through a garden. Each segment you draw represents a turn or straight portion of the path. Instead of treating each segment as separate pieces, you want them to be part of one continuous trail, making it easier to adjust the whole path as needed.
Polygon Command
Chapter 5 of 7
🔒 Unlock Audio Chapter
Sign up and enroll to access the full audio experience
Chapter Content
F. POLYGON COMMAND:
It creates a regular polygon with the given number of sides and side length.
COMMAND: POLYGON or pol.
Detailed Explanation
The Polygon Command is designed to draw shapes that have equal-length sides and equal angles, like squares or triangles. You can specify how many sides the polygon should have and the length of each side during creation. It’s a straightforward way to generate symmetrical and regularly shaped figures.
Examples & Analogies
Think of making a cookie cutter in a specific shape, like a star or heart. You decide how many points or sides the shape should have, and then you determine how big it needs to be. Once you set those parameters, you can easily create a perfect shape that you can then use in your baking!
Rectangle Command
Chapter 6 of 7
🔒 Unlock Audio Chapter
Sign up and enroll to access the full audio experience
Chapter Content
RECTANGLE COMMAND:
It creates a rectangle. This rectangle acts as one object.
COMMAND: RECTANGLE or rec.
Detailed Explanation
The Rectangle Command allows you to create rectangles by simply selecting two opposite corners. The resulting rectangle is treated as a single object, which simplifies the editing process. You can also add properties like chamfers and fillets to the corners to create finished edges.
Examples & Analogies
Creating a rectangle is similar to laying down the foundation blocks of a house. You pick two corners to establish the shape, and everything in between fills in to create your solid foundation. Each rectangle can represent a room or structure, which you can further detail as needed.
Ellipse Command
Chapter 7 of 7
🔒 Unlock Audio Chapter
Sign up and enroll to access the full audio experience
Chapter Content
H. ELLIPSE COMMAND:
It is used to create an ellipse by selecting three points.
COMMAND: ELLIPSE or el.
Detailed Explanation
The Ellipse Command allows you to draw elliptical shapes by selecting three defining points. This creates a smooth, oval shape, which is different from a circle due to its elongated nature. You simply pick the points where you want the ellipse to be defined and the software creates the shape accordingly.
Examples & Analogies
Key Concepts
-
Line Command: Essential for creating straight lines.
-
Circle Command: Useful for creating circles in various ways.
-
Modify Tools: A set of commands crucial for altering existing items.
Examples & Applications
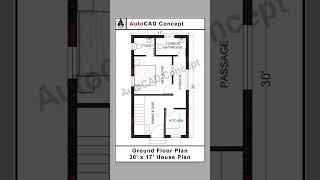
Using the Line command to create the outline of a house plan.
Implementing the Circle command to design wheels in a vehicle blueprint.
Applying the Arc command to create smooth edges in architectural designs.
Memory Aids
Interactive tools to help you remember key concepts
Rhymes
To create a line, you simply press L, it's direct and clear, like my drawing shell.
Stories
Imagine a circle drawing class where each student starts with a compass. They line up at a center, spin around to make perfect circles. This helps remember the Circle command!
Memory Tools
Remember 'C' for Circle and 'L' for Line when drawing those crucial shapes.
Acronyms
L for Lines, C for Circles, P for Polylines - **LCP** helps you recall key commands.
Flash Cards
Glossary
- Line Command
A command in CAD that creates straight line segments.
- Circle Command
A command used to create circles based on different parameters.
- Arc Command
A command that creates curved segments based on specified points.
- Polyline
A series of connected line segments treated as a single object.
- Modify Tools
Commands that alter existing objects like ERASE, COPY, and TRIM.
Reference links
Supplementary resources to enhance your learning experience.