
MODIFY TOOLS
Enroll to start learning
You’ve not yet enrolled in this course. Please enroll for free to listen to audio lessons, classroom podcasts and take practice test.
Interactive Audio Lesson
Listen to a student-teacher conversation explaining the topic in a relatable way.
Introduction to Modify Tools
🔒 Unlock Audio Lesson
Sign up and enroll to listen to this audio lesson

Today, we will begin with the MODIFY TOOLS section. These tools are essential for altering objects in CAD efficiently. Can anyone tell me why modifying existing objects is useful?

It saves time by allowing us to adjust designs without starting from scratch.
Exactly! Modifying tools optimize our workflow. Let's start with the **Erase Command**. What do you think it does?

I think it deletes things we've drawn.
Correct! The command syntax is `ERASE` or `e`. It's our go-to for removing unwanted objects. Now, who can think of a situation where we would use the erase command?

If we made a mistake while drawing?
Exactly! Mistakes are normal during drafting, and the erase command helps us rectify them. Let's move on to the **Copy Command**.
Copy and Mirror Commands
🔒 Unlock Audio Lesson
Sign up and enroll to listen to this audio lesson

The **Copy Command** allows us to create duplicates of objects in our drawing. Its syntax is `COPY` or `co`. Why is copying a design element useful?

We can use the same shape multiple times without redrawing!
Right! It streamlines the drawing process. Now, moving on to the **Mirror Command**. Who can explain how the mirror command works?
It creates a mirror image of an object, usually for symmetrical designs.
Exactly! The syntax is `MIRROR` or `MI`. It’s very useful when our design has symmetry. Can anyone think of an example of where we might use this?
In architecture, like when we draw a building that looks the same on both sides!
Perfect example! Let’s summarize today. We discussed the Erase, Copy, and Mirror commands, all designed to simplify our workflow.
Offset and Array Commands
🔒 Unlock Audio Lesson
Sign up and enroll to listen to this audio lesson
Let’s discuss the **Offset Command**. What does this command do?
It creates a new object that’s a certain distance from the original one.
Right! The syntax is `OFFSET` or `O`. We can set the distance we want. Now, what about the **Array Command**? Can anyone explain its purpose?
It creates multiple copies of an object in rows and columns!
Exactly! This is useful for repeating patterns. The syntax is `ARRAY` or `ar`. Let's think about a practical example of where we would use the array command.
Like placing chairs in a grid pattern in a room layout!
Great observation! Today we covered the Offset and Array Commands, emphasizing their usefulness in creating parallel or repeat objects efficiently.
Manipulation Commands
🔒 Unlock Audio Lesson
Sign up and enroll to listen to this audio lesson
Now, let’s dive into the manipulation commands, starting with the **Move Command**. What does this command do?
It shifts selected objects from one place to another.
Correct! The syntax is `MOVE` or `M`. Next is the **Rotate Command**. How does it work?
It changes the angle of an object around a point!
Exactly! The command is `ROTATE` or `RO`. Students, can you think of when we might rotate an object in a design?
If we need to align it with another object at a specific angle!
Spot on! Now let’s summarize what we learned about Move and Rotate. Each command provides a powerful way to manipulate objects in your CAD drawing.
Scaling, Trimming, and Extending
🔒 Unlock Audio Lesson
Sign up and enroll to listen to this audio lesson
As we conclude, let’s discuss the **Scale Command**. What does scaling do?
It enlarges or reduces the size of an object!
Correct! The syntax is `SCALE` or `SC`. Now, can anyone explain the **Trim and Extend Commands**?
Trim cuts an object at a boundary, and Extend makes it longer to meet another object.
Perfect! The syntax for Trim is `TRIM` or `TR` and for Extend is `EXTEND` or `EX`. Why are these commands important?
They help refine designs by making them neat and accurate!
Exactly! Great job today. We covered Scaling, Trimming, and Extending. Each command is vital in enhancing the overall quality of our drafts.
Introduction & Overview
Read summaries of the section's main ideas at different levels of detail.
Quick Overview
Standard
The section details several commands used to modify existing objects in computer-aided design drawings, focusing on functionalities such as erasing, copying, mirroring, and more. Each command is accompanied by a basic explanation and syntax for practical application.
Detailed
Detailed Summary
The MODIFY TOOLS section provides a comprehensive overview of commands that enable users to alter existing objects in computer-aided design (CAD). These include:
- Erase Command: Deletes selected objects. Syntax:
ERASEore. - Copy Command: Creates duplicates of selected objects. Syntax:
COPYorco. - Mirror Command: Generates mirror images of selected objects. Useful for symmetrical designs. Syntax:
MIRRORorMI. - Offset Command: Produces a new object similar to the selected object at a specified distance. Syntax:
OFFSETorO. - Array Command: Creates multiple copies of objects in rows and columns or around a circle. Syntax:
ARRAYorar. - Move Command: Shifts objects within the drawing area. Syntax:
MOVEorM. - Rotate Command: Rotates an object around a specified point. Syntax:
ROTATEorRO. - Scale Command: Adjusts an object's size proportionally. Syntax:
SCALEorSC. - Stretch Command: Changes the size of an object by pulling or pushing from a side. Syntax:
STRETCH. - Trim Command: Cuts off part of an object at a defined edge. Syntax:
TRIMorTR. - Extend Command: Extends an object to meet another. Syntax:
EXTENDorEX. - Break Command: Splits an object into two at chosen points. Syntax:
BREAKorBR. - Chamfer Command: Joins two non-parallel lines with a beveled edge. Syntax:
CHAMFERorCHA. - Fillet Command: Connects two objects with a rounded arc of a specified radius. Syntax:
FILLET.
These commands are crucial for efficient workflow in CAD, allowing for rapid transformations and adjustments to designs.
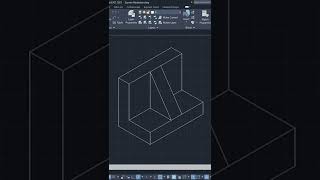
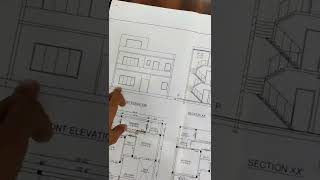
Youtube Videos


Audio Book
Dive deep into the subject with an immersive audiobook experience.
Erase Command
Chapter 1 of 14
🔒 Unlock Audio Chapter
Sign up and enroll to access the full audio experience
Chapter Content
It deletes the selected objects from drawing.
COMMAND: ERASE or e.
Detailed Explanation
The Erase Command is used to remove objects from the drawing. When you activate it by typing 'ERASE' or using the shortcut 'e', you will then select the objects you want to delete. After selecting, you press 'Enter', and the chosen items will be removed from your workspace.
Examples & Analogies
Think of the erase feature in a digital drawing tool like an eraser in a real-life sketchbook. Just as the eraser removes pencil marks from the page, the Erase Command clears selected drawings from your digital canvas.
Copy Command
Chapter 2 of 14
🔒 Unlock Audio Chapter
Sign up and enroll to access the full audio experience
Chapter Content
It creates one or more number of copies of selected objects within the drawing.
COMMAND: COPY or co.
Detailed Explanation
The Copy Command allows you to duplicate objects in your drawing. By typing 'COPY' or 'co', you can select the original object and indicate where you want to place the copy. You can make multiple copies by repeating the process or specifying how many copies you want.
Examples & Analogies
Imagine you have a favorite drawing that you want to share with friends. The Copy Command is like making photocopies of that artwork. You keep the original while distributing the copies to others.
Mirror Command
Chapter 3 of 14
🔒 Unlock Audio Chapter
Sign up and enroll to access the full audio experience
Chapter Content
It creates a mirror image of the selected object in selected direction. It helps to complete drawing faster if the object is symmetrical about any axis.
COMMAND: MIRROR or MI
Select object; pick objects to mirror. First point of mirror line; pick a point. Second point; pick second point.
Delete old objects?
Detailed Explanation
The Mirror Command creates a flipped version of selected objects along a defined line, helping you quickly create symmetrical designs. After invoking the command with 'MIRROR' or 'MI', you select the object you wish to duplicate. You then define the mirror line by selecting two points. Finally, you get asked whether to delete the original object, giving you flexibility in your design process.
Examples & Analogies
Consider a painter using a stencil to create an identical design on either side of a canvas. The Mirror Command works similarly by allowing the user to create a symmetrical reflection without needing to redraw details.
Offset Command
Chapter 4 of 14
🔒 Unlock Audio Chapter
Sign up and enroll to access the full audio experience
Chapter Content
It creates a new object that is similar to a selected object at a distance from the original object.
COMMAND: OFFSET or O.
Detailed Explanation
The Offset Command allows you to create a parallel version of an existing object, maintaining the same shape but located at a specified distance away. Activate it using 'OFFSET' or 'O', define the offset distance, and then select the object you want to offset. This is useful for creating parallel lines, walls, or contours.
Examples & Analogies
Imagine cutting a piece of paper and wanting to make a duplicate shape next to it—rather than redrawing the shape from scratch, you simply reposition it a little over. That's the principle behind the Offset Command.
Array Command
Chapter 5 of 14
🔒 Unlock Audio Chapter
Sign up and enroll to access the full audio experience
Chapter Content
It creates multiple copies of objects in given number of rows and columns or around an imaginary circle.
COMMAND: ARRAY or ar.
Detailed Explanation
The Array Command allows you to create multiple copies of an object arranged in a grid pattern (rows and columns) or in a circular arrangement. You activate this function with 'ARRAY' or 'ar' and then specify how many copies you need and their arrangement type.
Examples & Analogies
Think of a baker who places multiple similar cookies on a tray in an organized way. The Array Command functions like that, enabling you to systematically arrange multiple copies of objects in your design.
Move Command
Chapter 6 of 14
🔒 Unlock Audio Chapter
Sign up and enroll to access the full audio experience
Chapter Content
Objects can be shifted from one place to another place within the drawing area.
COMMAND: MOVE or M.
Detailed Explanation
The Move Command allows you to reposition an object within the drawing area. By typing 'MOVE' or 'M', you select the object you want to shift, and then you can specify a base point before indicating where to move it. This helps organize your layout efficiently.
Examples & Analogies
Imagine moving furniture within a room. Just like you can lift a chair and place it in a different spot to enhance the flow of the room, the Move Command lets you relocate elements of your drawing for better composition.
Rotate Command
Chapter 7 of 14
🔒 Unlock Audio Chapter
Sign up and enroll to access the full audio experience
Chapter Content
Rotates selected object around given axis to the given angle or about a base point.
COMMAND: ROTATE or RO.
Detailed Explanation
The Rotate Command allows you to change the orientation of an object by specifying an angle of rotation around a base point. When you type 'ROTATE' or 'RO', select your object, provide a pivot point, and then define the angle or reference for rotation.
Examples & Analogies
Think of turning the steering wheel of a car. As you turn it left or right (the rotation), everything in the direction you're facing changes accordingly. The Rotate Command lets you achieve similar transformations in your drawings.
Scale Command
Chapter 8 of 14
🔒 Unlock Audio Chapter
Sign up and enroll to access the full audio experience
Chapter Content
It enlarges or reduces the size of the objects equal in x, y, z directions according to the scale factor given.
COMMAND: SCALE or SC.
Detailed Explanation
The Scale Command adjusts the size of an object by a specific factor. This factor dictates whether the object is enlarged or reduced (greater than 1 enlarges, less than 1 reduces). You initiate this using 'SCALE' or 'SC', choose your object, and specify a base point and the scale factor.
Examples & Analogies
Consider using a magnifying glass to examine details in a photo. The Scale Command works in a similar way, either zooming out (making things smaller) or zooming in (making things larger) based on a specified factor.
Stretch Command
Chapter 9 of 14
🔒 Unlock Audio Chapter
Sign up and enroll to access the full audio experience
Chapter Content
To change the shape and size of the object by pulling or pushing from one side and also to move objects from one place to another place.
COMMAND: STRETCH.
Detailed Explanation
The Stretch Command changes the dimensions of an object by dragging its parts or vertices. This can modify an object's shape while also allowing movement to different places. You activate it by specifying which objects to stretch and the distance to reposition.
Examples & Analogies
Think of stretching a piece of clay. You can manipulate its shape and also adjust where it sits. The Stretch Command gives you similar creative freedom in your designs.
Trim Command
Chapter 10 of 14
🔒 Unlock Audio Chapter
Sign up and enroll to access the full audio experience
Chapter Content
To cutoff or erase an object precisely at an edge defined by other objects.
COMMAND: TRIM or TR.
Detailed Explanation
The Trim Command allows you to cut objects at their intersections with others. When you activate it with 'TRIM' or 'TR', you select the boundary objects that will define where the cuts should occur, followed by choosing the objects to trim down.
Examples & Analogies
Think of a gardener trimming a bush to maintain its shape. The Trim Command helps you neaten your designs by removing unnecessary parts, just like a gardener shapes the plant.
Extend Command
Chapter 11 of 14
🔒 Unlock Audio Chapter
Sign up and enroll to access the full audio experience
Chapter Content
It extends an object to meet another object.
COMMAND: EXTEND or EX.
Detailed Explanation
The Extend Command allows you to lengthen a line or edge to connect with another object. You activate this by typing 'EXTEND' or 'EX', selecting the boundaries of the object to be extended, and then the object you want to reach.
Examples & Analogies
Imagine stretching a rubber band to touch another object. The Extend Command enables similar adjustments in your drawing by allowing shapes to reach out to one another.
Break Command
Chapter 12 of 14
🔒 Unlock Audio Chapter
Sign up and enroll to access the full audio experience
Chapter Content
This method is used to cut an object into two parts at selected point or to remove part of the object between two selected points.
COMMAND: BREAK or BR.
Detailed Explanation
The Break Command allows you to split an object into segments or eliminate a section between two specified points. By using 'BREAK' or 'BR', you select the object, define the break points, and create distinct segments.
Examples & Analogies
It's like cutting a string into two pieces. The Break Command helps you segment your designs to fit your specific needs, just like tailoring fabric for a project.
Chamfer Command
Chapter 13 of 14
🔒 Unlock Audio Chapter
Sign up and enroll to access the full audio experience
Chapter Content
Connects two non-parallel lines by extending them to intersect or to join with a beveled line at specified distance from intersection.
COMMAND: Chamfer or CHA.
Detailed Explanation
The Chamfer Command allows you to join two non-parallel lines with an angled cut, creating a smooth transition. Use 'CHAMFER' or 'CHA', and specify the distances from the intersection point to create a beveled edge.
Examples & Analogies
This is similar to cutting the corners off a piece of cardboard for safety or aesthetics. The Chamfer Command produces rounded or sloped edges, just like those adjusted corners.
Fillet Command
Chapter 14 of 14
🔒 Unlock Audio Chapter
Sign up and enroll to access the full audio experience
Chapter Content
Filleting connects two objects with a round arc of a specified radius.
COMMAND: FILLET.
Detailed Explanation
The Fillet Command is used to round off the meeting points of two lines or shapes, creating a smoother transition. By selecting the two lines and using the 'FILLET' command, you can specify the radius of the curve to be applied.
Examples & Analogies
Think about the smooth edges of a cup that makes it comfortable to hold. The Fillet Command helps create visually appealing designs with softened angles and corners, enhancing the overall look.
Key Concepts
-
Erase Command: Removes unwanted objects from a drawing.
-
Copy Command: Duplicates selected objects for reuse.
-
Mirror Command: Creates a symmetrical reflection of selected objects.
-
Offset Command: An offset replica of an object at a specified distance.
-
Array Command: Generates multiple copies in desired patterns.
-
Move Command: Relocates objects in the drawing space.
-
Rotate Command: Alters the orientation of objects based on a pivot.
-
Scale Command: Changes object dimensions uniformly.
-
Trim Command: Removes parts of an object up to a boundary.
-
Extend Command: Prolongs an object to reach another.
-
Break Command: Splits an object into distinct segments.
-
Chamfer Command: Joins two lines at a beveled intersection.
-
Fillet Command: Applies rounded corners between two lines.
Examples & Applications
Using the copy command to create multiple identical windows in a house plan.
Applying the mirror command to create the other side of a symmetrical building.
Using offset to create a boundary around a building layout at a specified distance.
Memory Aids
Interactive tools to help you remember key concepts
Rhymes
To copy is to double your art, in CAD it plays a vital part.
Stories
Imagine a busy architect who needs duplicates of design elements. They use the copy command, creating windows and doors with ease, all thanks to technology.
Memory Tools
Remember M.O.R.E C.T.S for Modify Tools: Mirror, Offset, Rotate, Erase, Copy, Trim, Scale.
Acronyms
REMEMBER
'M.O.D.E (Move
Offset
Delete
Extend) helps you maneuver through design seamlessly!'
Flash Cards
Glossary
- Erase Command
A tool that deletes selected objects from a drawing.
- Copy Command
Creates duplicates of selected objects in the drawing.
- Mirror Command
Generates a mirror image of the selected object.
- Offset Command
Creates a new object that is a specific distance from an existing one.
- Array Command
Generates multiple copies of an object in specified rows and columns.
- Move Command
Shifts objects from one location to another within the drawing area.
- Rotate Command
Rotates selected objects around a specified point.
- Scale Command
Enlarges or reduces the size of objects equally in all directions.
- Trim Command
Cuts off part of an object at a defined edge.
- Extend Command
Extends the length of an object to meet another.
- Break Command
Cuts an object into two parts at selected points.
- Chamfer Command
Connects non-parallel lines with a bevel or chamfered edge.
- Fillet Command
Rounds the corners between two objects with a specified radius.
Reference links
Supplementary resources to enhance your learning experience.