
Basic Drafting Commands
Enroll to start learning
You’ve not yet enrolled in this course. Please enroll for free to listen to audio lessons, classroom podcasts and take practice test.
Interactive Audio Lesson
Listen to a student-teacher conversation explaining the topic in a relatable way.
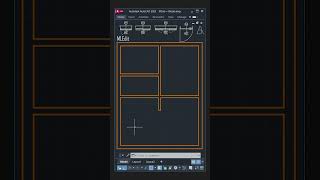
Line Command
🔒 Unlock Audio Lesson
Sign up and enroll to listen to this audio lesson

Today, we begin with the Line command. It allows you to draw straight lines by specifying two points. Can anyone tell me the command we use?

Is it 'LINE'?
That's correct! To draw a line from the origin, you would type `LINE`, then specify the first point as `0,0`, and the next point as, say, `100,0`. What's important to remember is that the command effectively connects these points.

So it’s like connecting dots?
Exactly, you visualize it as connecting dots on a grid! To remember this, think of 'LINE' as the 'Linking Inter-Node Elements'. Can anyone share when this command might be useful?

When sketching the foundation layout for a building.
Great example! Drawing foundation walls is indeed a perfect application. Remember, practice drawing various lines to become proficient.
Circle Command
🔒 Unlock Audio Lesson
Sign up and enroll to listen to this audio lesson

Next, let's explore the Circle command, which allows you to create circles by defining a center and radius. The command is `CIRCLE`. What are the steps to use it?
First, type `CIRCLE`, then specify the center point.
Correct! After the center, what do we need to define?

The radius!
Exactly! For instance, if the center is at `50,50` and radius `10`, your command would look like this: `CIRCLE`, specify center `50,50`, and then radius `10`. Why would we need circles in civil engineering?
For things like water tanks or circular foundations.
Excellent point! Remember, when you think of circles in engineering, consider all the cylindrical structures. To recap, think of circles as 'Cylindrical Structures Originating Radically'.
Rectangle Command
🔒 Unlock Audio Lesson
Sign up and enroll to listen to this audio lesson
Now let’s talk about the Rectangle command. It is significant for creating rectangular shapes quickly. Who can explain how to use the `RECTANGLE` command?
You specify the first corner and then the opposite corner.
That's right! This method allows you to draw quickly. For example, if you want to create a rectangle from `0,0` to `100,50`, you would input `RECTANGLE`, corner at `0,0` and the opposite corner at `100,50`. Why might this be useful?
For laying out rooms or sections in buildings.
Absolutely! Remember that rectangles are a foundational shape in architecture. To help you remember, think of 'Rectangular Enclosures Combine To Layout Efficiently'.
Trim and Extend Commands
🔒 Unlock Audio Lesson
Sign up and enroll to listen to this audio lesson
Moving on, let’s look at the Trim and Extend commands. These commands help refine your designs by managing excess lines. What does the Trim command do?
It removes unwanted parts of objects.
Exactly! To use the command, you would type `TRIM` and select the lines you want to trim. What about Extend?
It makes a line meet another line or boundary.
That's correct! Use `EXTEND` to stretch lines. Think of Trim and Extend as 'Tidy and Elongate Management'. When might you use these commands?
When we're finalizing plans and need to clean them up.
Excellent! Always use these tools proactively for better organization!
Introduction & Overview
Read summaries of the section's main ideas at different levels of detail.
Quick Overview
Standard
In this section, we explore key drafting commands within CAD software including Line, Circle, Rectangle, Trim, Extend, Offset, and Mirror. These commands are crucial for generating accurate designs and enhancing workflow efficiency in civil engineering applications.
Detailed
Basic Drafting Commands
Overview
This section provides an introduction to the basic drafting commands used in Computer-Aided Drafting (CAD), which are essential for creating precise designs in civil engineering. Understanding these commands enables engineers and draftsmen to produce, modify, and optimize their drawings effectively.
Key Commands
- Line Command: Enables users to create straight lines between specified points. For example, using the command
LINEand specifying two coordinates allows for direct line drawing. - Circle Command: Allows users to draw circles based on center point and radius. Command syntax includes
CIRCLEwhich requires defining the center and radius values. - Rectangle Command: Facilitates the drawing of rectangles by specifying the two opposite corners using the
RECTANGLEcommand. - Trim and Extend: These commands enhance design accuracy—
TRIMremoves excess portions of shapes, whileEXTENDlengthens an object toward another boundary. - Offset and Mirror:
OFFSETis used to create parallel lines or curves at a defined distance, whereasMIRRORproduces a mirrored counterpart of a selected object along a chosen axis.
By mastering these commands, civil engineers and designers can significantly enhance the accuracy and efficiency of their drafting processes.
Youtube Videos


Audio Book
Dive deep into the subject with an immersive audiobook experience.
Line Command
Chapter 1 of 5
🔒 Unlock Audio Chapter
Sign up and enroll to access the full audio experience
Chapter Content
Line Command
Draws straight lines between two points.
Command: LINE
Specify first point: 0,0
Specify next point: 100,0
Detailed Explanation
The Line Command allows you to draw straight lines in a CAD environment. To use this command, you start by typing 'LINE' into the command line. Then, you need to specify the first point of your line by entering its coordinates, for example (0,0). After that, you specify the second point where you want the line to end, such as (100,0). This creates a straight horizontal line from the first point to the second.
Examples & Analogies
Think of drawing a straight line on paper with a ruler. You first place the ruler down at the starting point (0,0) and mark it. Then, you move your pencil to the endpoint (100,0) and draw a straight line between these two points. It’s like using a defined path to connect two dots accurately.
Circle Command
Chapter 2 of 5
🔒 Unlock Audio Chapter
Sign up and enroll to access the full audio experience
Chapter Content
Circle Command
Draws circles using center and radius/diameter.
Command: CIRCLE
Specify center point: 50,50
Specify radius: 10
Detailed Explanation
The Circle Command is used to create circular shapes in your drawing. To invoke the command, you type 'CIRCLE'. The next step is to specify the center point of the circle, for instance, at (50,50). After that, you need to provide the radius of the circle, which in this case is 10 units. This will result in a circle that is centered at the specified point with the given radius.
Examples & Analogies
Imagine placing a pin at the center of a round piece of paper, and then using a string tied to the pin to draw a circle. The length of the string represents the radius, guiding how far your pencil will go from the center to create a perfect circle.
Rectangle Command
Chapter 3 of 5
🔒 Unlock Audio Chapter
Sign up and enroll to access the full audio experience
Chapter Content
Rectangle Command
Draws rectangles by specifying two opposite corners.
Command: RECTANGLE
Specify first corner: 0,0
Specify opposite corner: 100,50
Detailed Explanation
The Rectangle Command enables you to create rectangles in your drawing. To activate this command, you enter 'RECTANGLE'. You begin by specifying the first corner of the rectangle at coordinates (0,0). Then, you specify the opposite corner, for example at (100,50). This creates a rectangle that spans between these two corners, creating a width of 100 units and a height of 50 units.
Examples & Analogies
Visualize drawing a rectangular garden plot. You start at one corner of the garden at point (0,0) and stretch the corner to point (100,50). The two corners define the size of your garden, just like how the command defines the shape of the rectangle you are drawing.
Trim and Extend
Chapter 4 of 5
🔒 Unlock Audio Chapter
Sign up and enroll to access the full audio experience
Chapter Content
Trim and Extend
- Trim: Removes unwanted parts of objects.
- Extend: Lengthens an object to meet another boundary.
Detailed Explanation
The Trim and Extend commands are useful for refining your drawings. The Trim command lets you cut away sections of lines or shapes that you don't need, making the drawing cleaner. You can activate it by typing 'TRIM'. On the other hand, the Extend command allows you to lengthen lines or objects until they touch another boundary or object in your drawing. This is activated by typing 'EXTEND'. Both commands are essential for creating professional-looking drawings.
Examples & Analogies
Think about cutting a piece of string to remove any frayed ends you don't want - that's like the Trim command. Now, imagine you need a longer string for a DIY project, so you tie another string to the existing one until you reach the desired length This is similar to how the Extend command works.
Offset and Mirror
Chapter 5 of 5
🔒 Unlock Audio Chapter
Sign up and enroll to access the full audio experience
Chapter Content
Offset and Mirror
- Offset: Creates parallel lines or curves at a specified distance.
- Mirror: Creates a mirrored copy about a defined axis.
Detailed Explanation
The Offset command is used to create a copy of a line or shape at a set distance from the original, effectively creating parallel lines. You can enter the distance you want the new line to be from the original, which is useful in many design processes. The Mirror command, on the other hand, allows you to create a perfect mirror image of selected objects across a specified line or axis. This can help save time when creating symmetrical designs.
Examples & Analogies
Imagine drawing a parallel line next to an existing one, just like how you’d outline something in coloring - that’s the Offset command. Now, think of placing a piece of paper over a drawn sketch and tracing it to get a mirror image - that's similar to how the Mirror command works within CAD.
Key Concepts
-
Line Command: Enables creation of straight lines by specifying end points.
-
Circle Command: Draws circles defined by a center point and radius.
-
Rectangle Command: Creates rectangles by selecting two corners.
-
Trim Command: Removes unnecessary portions of objects.
-
Extend Command: Lengthens an object to meet the edge of another.
-
Offset Command: Generates parallel lines at a specified distance.
-
Mirror Command: Produces a mirrored replica of an object.
Examples & Applications
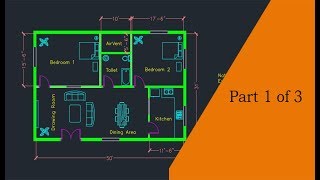
Using the Line command, you can create boundaries of a plot when drafting site plans.
The Circle command can be used to represent the base of cylindrical tanks in a design.
Memory Aids
Interactive tools to help you remember key concepts
Rhymes
A line is straight and fine, draw it well, you've done just fine!
Stories
Imagine a builder named 'Rect' who could only build walls perfectly by knowing the corners of his rectangles!
Memory Tools
L-C-R-T-E-O-M: Line, Circle, Rectangle, Trim, Extend, Offset, Mirror.
Acronyms
CREATE for Remembering
Circle
Rectangle
Extend
And Trim Elements.
Flash Cards
Glossary
- Line Command
A command in CAD used to create straight lines between specified coordinates.
- Circle Command
A command to draw circles based on center point and radius.
- Rectangle Command
A command used to draw rectangles by specifying two opposite corners.
- Trim Command
Removes portions of objects that extend beyond a defined boundary.
- Extend Command
Increases the length of an object to meet another object's edge.
- Offset Command
Creates parallel lines or curves at a specified distance from an existing line or curve.
- Mirror Command
Creates a mirrored copy of an object about a specified axis.
Reference links
Supplementary resources to enhance your learning experience.