
Plot Settings
Enroll to start learning
You’ve not yet enrolled in this course. Please enroll for free to listen to audio lessons, classroom podcasts and take practice test.
Interactive Audio Lesson
Listen to a student-teacher conversation explaining the topic in a relatable way.
Understanding Paper Size and Plot Area
🔒 Unlock Audio Lesson
Sign up and enroll to listen to this audio lesson

Today, we will start with the basics of plot settings. Why do you think choosing the correct paper size is important when printing CAD drawings?

I think it's important so that the details fit properly on the page.
Exactly! Using the correct paper size ensures that all details are legible and presented correctly. Now, can anyone tell me what options we have for plot areas?

Is it just the whole layout or can we select a window?
Great observation! You can choose either the entire layout or select a specific window. This flexibility allows you to focus on critical areas of your design. Let’s remember this with the acronym 'P-W' for Paper size and Plot area selection.

Can we save these settings for future use?
Yes! CAD allows you to save your plot settings for easy access again. This is a great way to maintain consistency across different projects. So, what key terms should we take note of here?

Paper size and Plot area.
Excellent! To wrap up, selecting the right paper size and defining the plot area are foundational steps in preparing CAD documents.
Defining Plot Scale and Style
🔒 Unlock Audio Lesson
Sign up and enroll to listen to this audio lesson

Now let’s discuss plot scale. Why do you think the scale matters in CAD drawings?
It helps to accurately represent the real-world dimensions.
Exactly! Using the correct scale, like 1:100, ensures that your drawings translate appropriately to the physical space. Can anyone name a plot style we might use?
Monochrome?
Correct! Monochrome plots can clearly illustrate differences in line work without unnecessary distraction. Let’s create a mnemonic: 'Scale Shows Space'. What does that remind us of?
The plot scale indicates how things are represented.
Well said! As we complete this session, remember that plot scale and style play crucial roles in how efficiently a drawing communicates its design intent.
Title Blocks and Viewports
🔒 Unlock Audio Lesson
Sign up and enroll to listen to this audio lesson
Finally, we must discuss title blocks. Why do you think title blocks are necessary in a CAD drawing?
They provide key information about the drawing!
Right! Title blocks contain essential details like the drawing title and scale, which help users understand the context. Can anyone share an example of what we might include in a title block?
The date and sheet number are really important using PWS for remember.
Nice mnemonic! Beyond that, how about viewports? What role do they play?
Some viewports can help show different views at different scales on the paper.
Absolutely! Viewports allow for multiple design perspectives within a single layout, further enhancing understanding. So, let’s recap: title blocks tell you what, and viewports show you how. Excellent work today, everyone!
Introduction & Overview
Read summaries of the section's main ideas at different levels of detail.
Quick Overview
Standard
In this section, we delve into the key aspects of plot settings in CAD, emphasizing the importance of selecting paper sizes, defining plot areas, determining scales, and integrating standardized title blocks, all of which ensure that CAD drawings are accurately presented and easy to interpret.
Detailed
Detailed Summary
The section on Plot Settings is integral to the effective use of Computer-Aided Drafting (CAD) in civil engineering, as it outlines critical parameters that influence how drawings are outputted for presentation and review. Key elements discussed include:
- Paper Size: Selecting appropriate sizes such as A4, A3, A1, etc., that align with project standards and user requirements.
- Plot Area: Options to specify what part of the drawing is to be printed, whether it be a selected window or the entire layout sheet.
- Plot Scale: Understanding the scale needed for accurate representation of drawings (e.g., 1:100, 1:50) is crucial for ensuring dimensions are understood correctly by reviewers.
- Plot Style Table: Choosing between monochrome and color styles impacts the clarity and distinction of components within the drawing.
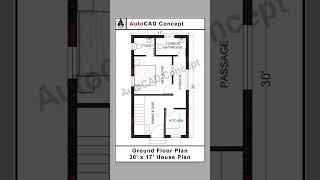
- Viewports in Layout: Utilizing multiple views at different scales allows for comprehensive presentations of designs in paper space.
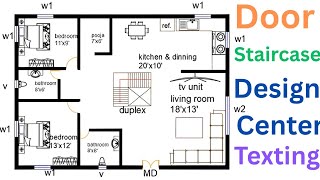
- Title Block and Border: The inclusion of standardized title blocks provides essential project information, ensuring drawings convey all necessary details, including titles, dates, and sheet numbers.
These settings are fundamental for preparing effective documentation in civil engineering and ensure that the presented drawings meet industry standards.
Youtube Videos


Audio Book
Dive deep into the subject with an immersive audiobook experience.
Paper Size
Chapter 1 of 4
🔒 Unlock Audio Chapter
Sign up and enroll to access the full audio experience
Chapter Content
• Paper size (A4, A3, A1, etc.)
Detailed Explanation
When preparing a drawing for printing or plotting, the first important consideration is the size of the paper. Common sizes used in CAD include A4, A3, and A1. These sizes dictate how large your drawing will appear on physical media. Choosing the correct paper size is crucial because it must match the detail level and scale of your drawing.
Examples & Analogies
Think of paper size like choosing a canvas for a painting. If you're creating a large mural, you'll want a big canvas like A1. But if you're making a small sketch, then A4 would suffice. Similar to that, the size of the paper you choose will impact the detail and visibility of your drawing in CAD.
Plot Area
Chapter 2 of 4
🔒 Unlock Audio Chapter
Sign up and enroll to access the full audio experience
Chapter Content
• Plot area: Window or Layout
Detailed Explanation
The plot area defines which part of your drawing will be printed or plotted. You can select a specific area using the 'Window' option, where you click and drag to create a rectangle that encompasses only the parts of the drawing you want to include. Alternatively, you can plot the entire 'Layout', which is the configured space that includes your title block and other annotations.
Examples & Analogies
Imagine you are taking a photo of a landscape. You can either focus on just one beautiful tree by adjusting your camera to frame it perfectly (this is similar to the 'Window' option) or capture the entire viewfinder which includes the tree, sky, and ground (like the 'Layout' option).
Plot Scale
Chapter 3 of 4
🔒 Unlock Audio Chapter
Sign up and enroll to access the full audio experience
Chapter Content
• Plot scale: 1:100, 1:50 etc.
Detailed Explanation
Plot scale indicates the relationship between the size of the drawing on paper and its actual size in real life. A scale of 1:100 means that 1 unit on the drawing represents 100 units in reality. Choosing the appropriate scale is essential to ensure that the drawing communicates the necessary details clearly, especially for dimensions.
Examples & Analogies
It is similar to using a map. If you have a map where 1 inch represents 100 miles, you can visualize how far apart locations are. Similarly, if you set a plot scale to 1:50, you can accurately represent your project's dimensions on paper, making it easier for others to understand the real-world measurements.
Plot Style Table
Chapter 4 of 4
🔒 Unlock Audio Chapter
Sign up and enroll to access the full audio experience
Chapter Content
• Plot style table: Monochrome or color
Detailed Explanation
The plot style table dictates how colors and line types appear in the printed drawing. You can choose between a monochrome setting, where everything prints in black and white, or a color setting, which allows you to use different colors to convey different meanings (like distinguishing between existing and proposed elements). Selecting the right plot style table is vital to ensure your drawing remains legible and conveys the necessary information appropriately.
Examples & Analogies
Think about designing a flowchart. Using different colors can help illustrate the various processes or decisions, making it easier to understand at a glance. Similarly, when plotting your CAD drawing, the right colors can highlight certain features or elements, guiding the viewer's attention to what’s important.
Key Concepts
-
Paper Size: The dimensions that affect how drawings are printed.
-
Plot Area: Specifies the section of the drawing to be printed.
-
Plot Scale: Describes the relationship between CAD dimensions and their real-world counterparts.
-
Plot Style Table: Determines the visual output of the drawing during printing.
-
Viewports: Different regions of a layout that can display varying scales.
-
Title Block: Essential information displayed on the drawing layout.
Examples & Applications
Using A3 paper size for architectural drawings to ensure all details fit comfortably.
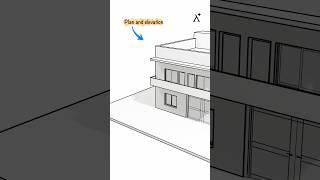
Implementing a viewport to show a floor plan and an elevation at different scales on the same sheet.
Memory Aids
Interactive tools to help you remember key concepts
Rhymes
When you plot, make it neat, choose your size to make it sweet.
Stories
Imagine an architect drawing a building design. They carefully select the paper size to ensure all elements fit perfectly, illustrating how important plot settings are in presenting their vision.
Memory Tools
Remember P-W for selecting Paper size and Plot area.
Acronyms
SPS for Scale, Paper size, and Style in plotting.
Flash Cards
Glossary
- Paper Size
The dimensions chosen for printing CAD drawings (e.g., A4, A3, A1) that affect layout.
- Plot Area
The specific region of the drawing selected for printing, either as a window or the entire layout.
- Plot Scale
The ratio that describes how the dimensions in the CAD drawing relate to their actual size when printed.
- Plot Style Table
A setting that determines how drawings are printed, using either monochrome or color styles.
- Viewports
Sections of the layout that display different parts of the drawing at varying scales.
- Title Block
A predefined template area on a drawing layout that contains necessary information about the drawing, such as title, date, and scale.
Reference links
Supplementary resources to enhance your learning experience.